Can You Put Metal Water Bottles in the Dishwasher? Stainless, Insulated & Coated Explained
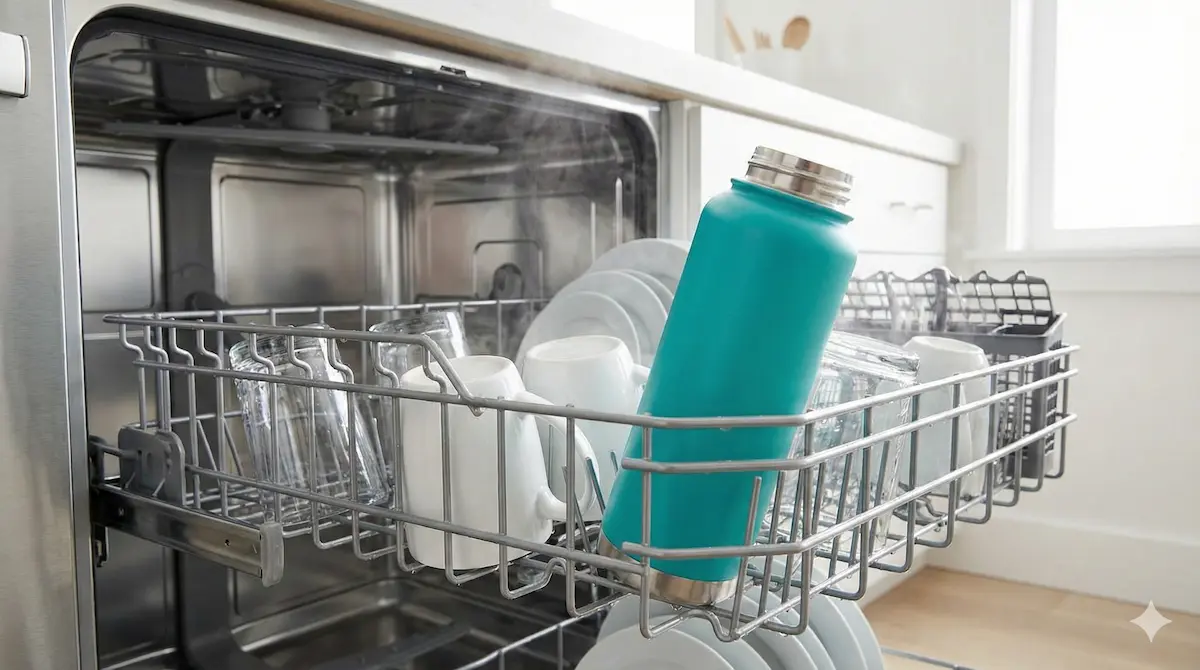
Yes—some metal water bottles can go in the dishwasher, but only when the manufacturer specifically says they are dishwasher safe. Plain stainless steel is the most likely to tolerate dishwashing. Hand-wash insulated, aluminum, painted, printed, or lined bottles unless their care instructions clearly permit a dishwasher.
The bottle body and lid may have different instructions, so check both. If there is no label or you cannot identify the bottle, handwashing is the safest choice.
Quick Dishwasher-Safety Guide
| Bottle type | Dishwasher guidance | Main concern |
|---|---|---|
| Plain, single-wall stainless steel | Usually acceptable if marked dishwasher safe | Water spots, discoloration, or incomplete cleaning through a narrow opening |
| Vacuum-insulated stainless steel | Follow the brand’s instructions; many are hand-wash only, while some are dishwasher safe | Damage to the finish, attached base components, or insulation system |
| Painted, printed, or powder-coated steel | Hand-wash unless the manufacturer specifically allows dishwashing | Fading, peeling, or cosmetic damage |
| Aluminum | Usually hand-wash unless clearly labeled dishwasher safe | Damage to the exterior or protective interior lining |
| Unknown metal or unmarked bottle | Hand-wash | Unknown coating, lining, adhesive, or insulation construction |
| Lids, straws, and gaskets | Check separately; use a top-rack mesh basket when permitted | Warping, trapped residue, or lost small parts |
The Science: Why Metal Water Bottles Are (and Aren’t) Dishwasher Safe
Whether you can put a metal water bottle in the dishwasher depends on four things:
- The metal, usually stainless steel or aluminum
- The construction, such as single-wall or vacuum-insulated
- Any coatings, liners, printed designs, adhesives, or attached base pieces
- The lid parts, including plastic, silicone, rubber, straws, and springs
Many plain, single-wall stainless steel bottles marked “dishwasher safe” can tolerate a normal dishwasher cycle. Insulated, coated, printed, or aluminum bottles require more caution because the metal body may survive while another component does not.
Heat: How Dishwashers Stress Bottle Components
Dishwashers use hot water, and some cycles add a high-temperature wash or heated drying period. That heat can:
What I Use For This Job
Using the right tools saves time and protects your belongings. Here are my exact recommendations:
*As an Amazon Associate, TidyFormula earns from qualifying purchases.
- Soften adhesives used for logos, decorative wraps, nonslip bases, or attached caps
- Warp plastic lid components or affect how they fit
- Accelerate wear on painted and printed finishes
- Damage a bottle if its insulation system or exterior construction was not designed for machine washing
Vacuum insulation is not automatically incompatible with a dishwasher. Some manufacturers design insulated bottles for machine washing, while others specifically require handwashing. The care instructions for the exact model are more reliable than a general rule about insulated bottles.
Detergents and Surface Damage
Dishwasher detergents are stronger and more alkaline than many handwashing liquids. Repeated exposure can:
- Dull or fade colored finishes
- Cause weak paint, decals, or printed designs to chip or peel
- Discolor or etch aluminum and some decorative metallic finishes
- Wear out rubber and silicone seals over time
Some aluminum bottles have a protective interior liner. If that liner becomes cracked, blistered, or starts peeling, stop using the bottle for drinks and follow the manufacturer’s replacement guidance.
Water Pressure and Movement
Strong spray and movement inside the rack can:
- Bang the bottle into other dishes, denting the base or rim
- Push water into cap mechanisms, straws, and gasket channels that are difficult to dry
- Move a lightweight bottle so the opening no longer faces the spray
- Leave the interior poorly cleaned when the bottle has a very narrow mouth
A dishwasher-safe label means the materials can tolerate an approved cycle. It does not guarantee that spray will reach every part of a deep, narrow bottle.
Stainless Steel vs. Aluminum vs. Coated Bottles
Stainless steel, uncoated and single-wall
- Generally the most dishwasher-tolerant option when labeled dishwasher safe
- Less reactive than aluminum during ordinary washing
- May still develop water spots, detergent residue, or cosmetic discoloration
Vacuum-insulated stainless steel
- Has inner and outer walls with a sealed vacuum space between them
- May include adhesives, exterior coatings, base caps, or other parts that are not dishwasher safe
- Can be machine washed only when the instructions for that model allow it
Aluminum bottles
- Are often lined to keep beverages from contacting bare aluminum
- Can discolor or develop surface damage from dishwasher detergent
- Should generally be hand-washed unless explicitly labeled dishwasher safe
Painted, printed, or powder-coated bottles
- May experience fading, chipping, bubbling, or peeling
- Can lose logos and measurement markings even when the metal underneath remains intact
- Should be hand-washed when appearance matters or the care instructions are unclear
Caps, lids, and straws
- Contain mixed materials that respond differently to heat
- May be top-rack safe even when the bottle body is not, or vice versa
- Need to be disassembled because residue collects under gaskets and inside valves
How to Check Whether Your Bottle Is Dishwasher Safe
Read the Exact Care Instructions
Look for care information:
- On the bottom of the bottle
- Under the lid or on the lid itself
- On the packaging
- In the product manual or original online product listing
- On the manufacturer’s support or care page
Dishwasher symbols are not identical across all brands. Wording such as “dishwasher safe,” “top rack only,” “lid dishwasher safe,” or “hand wash only” is more useful than guessing what an unfamiliar symbol means.
Check the Bottle and Lid Separately
Do not assume that one instruction applies to the entire bottle. A manufacturer may allow the stainless steel body in the dishwasher but require the lid, straw, or gasket to be hand-washed. The reverse is also possible.
Hand-Wash When the Bottle Cannot Be Identified
Treat the bottle as hand-wash only when:
- The label is missing or unreadable
- You cannot identify the material
- The bottle has an unknown interior lining
- It has glued decorations, rhinestones, vinyl decals, or an attached nonslip base
- It is already dented, peeling, cracked, or leaking
The “Top Rack” Rule for Metal Bottles
The top rack is commonly recommended for lids, straws, and small plastic parts because it generally exposes them to less intense heat than the bottom of the dishwasher. Place these items in a closed mesh basket so they cannot fall through the rack.
The bottle body is different. A tall bottle may not fit securely on the top rack, and some dishwasher-safe brands permit or recommend another position. Always follow the bottle’s care directions and your dishwasher’s loading instructions rather than forcing it onto the top rack.
When the Top-Rack Rule Applies
Use the top rack when:
- The manufacturer specifically says “top rack only”
- The item fits without interfering with a spray arm
- It can be secured so it will not flip, roll, or collect dirty water
- Small parts are contained in a dishwasher-safe mesh basket
Do not place a tall bottle where it blocks a spray arm or prevents the detergent dispenser from opening. If it does not fit securely, wash it by hand.
Step-by-Step Dishwasher Washing Guide
If the bottle is labeled dishwasher safe and has no special warning, use this method to reduce the risk of damage.
1. Inspect the Bottle Before Washing
Check for:
- Peeling or blistered interior lining
- Deep dents, split seams, or a loose base
- Cracked plastic around the lid or drinking spout
- Stretched, split, or brittle gaskets
- Rust-colored spots that do not wipe away
Do not machine-wash a damaged bottle. Replace damaged drinking components or contact the manufacturer if the interior surface or insulation appears compromised.
2. Empty and Pre-Rinse It
Pour out the drink and rinse away visible residue. Milk, smoothies, juice, sports drinks, sweetened coffee, and flavor powders can collect around threads, straws, and valves. A quick rinse prevents residue from drying in those areas before the dishwasher starts.
3. Disassemble Everything
- Remove the lid, straw, mouthpiece, and removable gaskets.
- Open flip tops and drinking valves when the instructions permit.
- Use a blunt plastic tool or your fingers to lift removable silicone rings; avoid cutting or stretching them.
- Keep track of the direction in which each gasket sits so it can be reinstalled correctly.
Do not pry apart a sealed lid mechanism that the manufacturer does not describe as removable.
4. Load the Bottle Correctly
- Position the bottle with its opening facing downward or toward the spray, as allowed by the rack design.
- Secure it between tines so it cannot roll or strike glassware.
- Make sure the opening is not tightly sealed over a rack tine, which can prevent water from entering.
- Place approved lids, straws, and gaskets in a closed mesh basket on the top rack.
- Spin the spray arms by hand before starting to confirm that the bottle does not block them.
5. Choose an Approved Cycle
- Use the cycle and temperature permitted by the manufacturer.
- Choose a normal or eco cycle when no special cycle is required.
- Avoid sanitize, high-temperature boost, and heated dry unless the care instructions specifically allow them.
- Use the normal amount of dishwasher detergent rather than adding extra for odors or stains.
Do not use chlorine bleach or other specialty cleaners in or on the bottle unless the bottle manufacturer expressly approves them.
6. Inspect and Dry Thoroughly
When the cycle finishes:
- Remove the bottle and all small parts.
- Check the interior, gasket channels, straw, and spout for remaining residue.
- Rinse or hand-scrub any area the dishwasher did not reach.
- Shake out trapped water and towel-dry accessible exterior surfaces.
- Air-dry the bottle and parts separately until completely dry.
- Reinstall the gaskets in their original orientation and test that the lid closes without pinching them.
Store the clean bottle with the lid off or loosely attached. Sealing it while damp can trap odors and moisture.
What Could Go Wrong? Real Dishwasher Risks
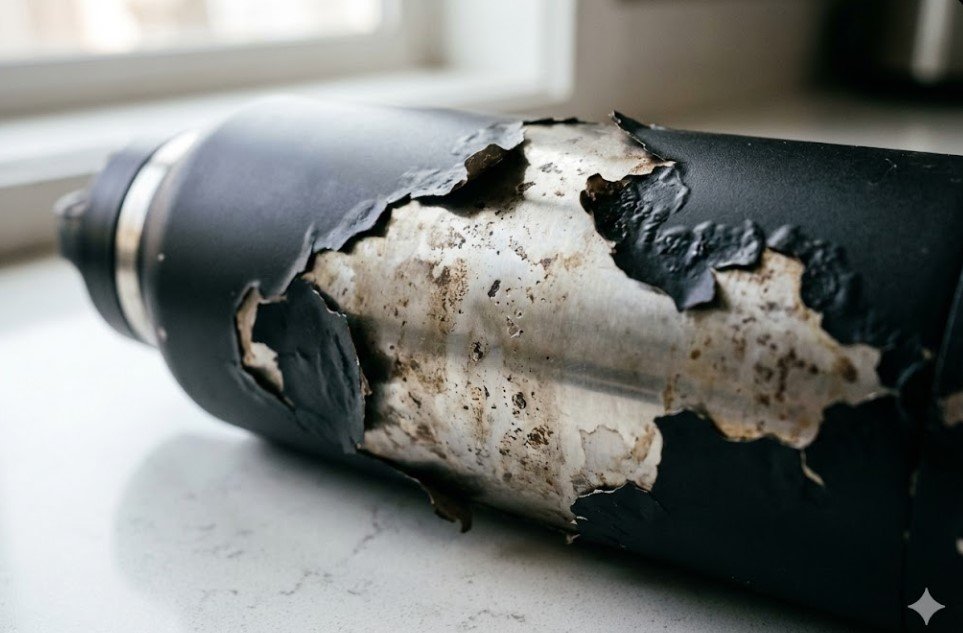
Putting the wrong metal bottle—or the right one on an unsuitable cycle—into the dishwasher can cause:
- Fading, chipping, or peeling paint
- Logos and designs may bubble, fade, or flake.
- Exposed edges can continue peeling during later washing.
- Loss of insulation
- The bottle may stop keeping drinks hot or cold for as long as it previously did.
- The outside may become unusually hot, cold, or damp during use.
- Rust-colored spots or corrosion
- Stainless steel can develop surface staining from mineral deposits, contact with rusty items, or prolonged moisture.
- Pitting, rough corrosion, or damage around the rim and interior requires closer inspection.
- Warped or leaking lids
- Plastic parts may twist out of shape and stop sealing correctly.
- Silicone gaskets can stretch, crack, or become displaced, causing leaks.
- Odors and residue in hidden areas
- Water and beverage residue can remain inside lids, straws, valves, and gasket channels.
- A dishwasher may not clean a narrow bottle or complex cap completely.
- Voided warranty
- Dishwashing a product labeled hand-wash only may exclude the resulting damage from warranty coverage.
When to Stop Using the Bottle
Stop using the bottle for drinks and seek replacement guidance if:
- The interior lining is cracked, blistered, or peeling
- The bottle has a split seam, sharp edge, or interior pitting
- The exterior becomes very hot when filled with a hot drink, suggesting failed insulation
- The lid remains visibly dirty or smells bad after complete disassembly and cleaning
- Black or colored buildup remains trapped inside a sealed lid mechanism
- The bottle leaks after the gasket has been cleaned and correctly reinstalled
Cosmetic fading on the outside does not necessarily make a stainless steel bottle unusable. Damage to the interior, rim, lid, liner, or insulation deserves more caution.
Alternatives: How to Hand Wash a Metal Water Bottle Safely
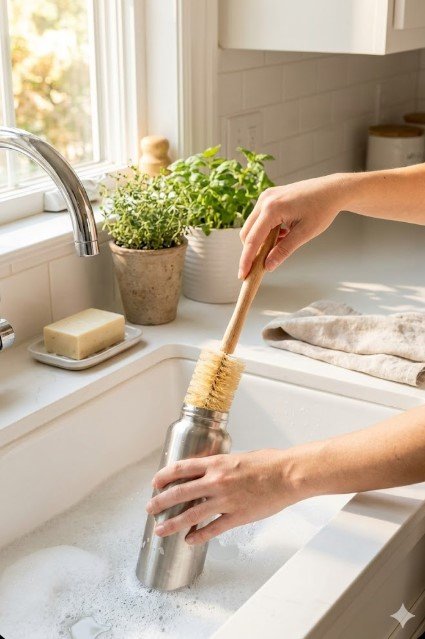
Even if your bottle is technically dishwasher safe, handwashing is often kinder to painted finishes, printed designs, insulated construction, and complex lids.
Clean the bottle after each day of use and promptly after drinks containing milk, sugar, juice, flavoring, or protein powder. Do not leave beverage residue sealed inside overnight.
Everyday Quick Clean
- Rinse the bottle with warm water.
- Add a small amount of mild dish soap and warm water.
- Use a nonabrasive bottle brush to scrub the walls, shoulder, and bottom.
- Clean the lid, spout, threads, straw, and removable gaskets with appropriately sized brushes.
- Rinse until no soap or loosened residue remains.
- Air-dry all parts separately with the bottle opening unobstructed.
Avoid steel wool, metal brushes, and harsh scouring powders. They can scratch stainless steel, damage coatings, and wear away an aluminum bottle’s lining.
Deep Cleaning for Odors and Stains
First check the manufacturer’s care instructions, particularly for aluminum or lined bottles. Pick one compatible method rather than combining cleaning products.
- Baking soda soak
- Add 1–2 teaspoons of baking soda and fill the bottle with warm water.
- Let it sit for a few hours or overnight, then scrub and rinse thoroughly.
- Vinegar rinse for compatible stainless steel bottles
- Fill 1/4 of the bottle with white vinegar and add warm water.
- Let it sit for 15–30 minutes, then scrub and rinse very well.
- Do not use vinegar on aluminum, natural stone accessories, or an unknown interior lining unless the manufacturer permits it.
- Bottle-cleaning tablets
- Use tablets labeled for reusable bottles and follow both the tablet and bottle manufacturers’ directions.
⚠️ Never mix vinegar with bleach or chlorine-based cleaners—this creates dangerous fumes.
Do not combine vinegar and baking soda as a “stronger” cleaner. Their reaction creates foam, but it does not replace thorough scrubbing and rinsing.
Handwashing Lids, Gaskets, and Straws
- Soak washable parts in warm, soapy water.
- Scrub around threads, flip tops, vents, and push-button areas.
- Run a straw brush through the full length of each straw.
- Remove silicone gaskets when designed to be removable and clean the channels underneath.
- Rinse and air-dry everything completely before reassembly.
Take a photo before removing several similar seals. Reinstalling a gasket upside down or in the wrong groove can make an otherwise undamaged bottle leak.
Troubleshooting After Dishwashing
The Bottle Has White Spots or a Chalky Film
This is often dried mineral or detergent residue. Wash the bottle by hand with warm water, mild dish soap, and a soft brush. If the bottle is uncoated stainless steel and its care instructions permit vinegar, a brief diluted vinegar rinse may help. Rinse and dry thoroughly afterward.
The Bottle Has Small Rust-Colored Spots
Wash it separately with a nonabrasive sponge and mild dish soap. Do not use steel wool, which can leave particles that later rust. If spots remain, spread, feel rough, or appear inside a damaged lining, stop using the bottle and contact the manufacturer.
The Lid Leaks After Washing
Remove the lid and check whether:
- The gasket is missing, twisted, or upside down
- Residue is preventing the gasket from sitting flat
- The plastic lid has warped
- The straw or valve was reassembled incorrectly
Clean and reinstall the gasket, then test the bottle over a sink. Replace a split, stretched, or hardened seal with the correct part rather than improvising with a different gasket.
The Bottle No Longer Keeps Drinks Hot or Cold
Confirm that the lid is closing correctly. If the outside of an insulated bottle quickly becomes hot or cold to the touch, or condensation appears across the body with a cold drink, the vacuum insulation may have failed. Stop using it for hot beverages and contact the manufacturer about replacement or warranty options.
The Bottle Still Smells After Cleaning
Smell the body, lid, straw, and gasket separately to identify the source. Repeat handwashing and allow every component to dry fully. Replace a straw or gasket that retains odor after cleaning. If odor or visible buildup is trapped inside a lid that cannot be opened for cleaning, replace the lid.
FAQ: Common Questions About Dishwashing Metal Water Bottles
1. Are stainless steel water bottles dishwasher safe?
Often, but not always. Plain stainless steel bottles are commonly dishwasher safe when the manufacturer says so. Insulated, painted, printed, or specially coated stainless steel bottles may have different instructions. Check the body and lid separately instead of assuming all stainless steel can go in the dishwasher.
2. Can insulated metal water bottles go in the dishwasher?
Only if the instructions for that exact bottle allow it. Some insulated bottles are designed for machine washing, while others contain coatings, adhesives, base pieces, or seals that require handwashing. If the label is missing or unclear, wash the bottle by hand.
3. How often should I wash a metal water bottle?
Wash it after each day of use and promptly after beverages containing sugar, milk, juice, flavoring, or protein powder. Clean the lid, straw, and gasket as well as the bottle body. Allow every part to dry completely before storage.
4. Can a dishwasher clean the inside of a narrow-mouth bottle?
Not always. Even when the bottle is dishwasher safe, the spray may not reach the bottom or shoulder through a narrow opening. Inspect it after the cycle and use a bottle brush if residue remains. A dishwasher-safe label describes material tolerance, not guaranteed cleaning performance.
5. Can metal bottle lids go in the dishwasher?
It depends on the lid. Simple plastic or silicone lids may be top-rack safe, while lids containing valves, springs, insulation, or delicate seals may require handwashing. Disassemble removable parts and secure approved small pieces in a closed mesh basket so they cannot fall onto the heating area.
Everything Mentioned Above
Before you leave, grab the tools you need to get the job done right the first time:
*As an Amazon Associate, TidyFormula earns from qualifying purchases.