DIY Car Interior Detailing: How to Clean Interior of Car Without Vacuum (Seats + Floors, No Machines)
You can clean a car interior without a vacuum by removing the mats, brushing loose debris into a pile, collecting it with a hand brush, lint roller, or tape, and wiping cloth surfaces with a barely damp microfiber towel. Work top to bottom, use very little cleaner, and let seats and carpet dry completely before closing the car.
I always notice it at the worst time. Sun hits the passenger seat just right and—boom—crumb city. Dust in the stitch lines, a sticky spot on the seat, and floor mats that make a dry crunch-crunch sound underfoot.
The smell is often the most noticeable part. Not garbage—just old snacks, warm plastic, and that trapped-car-air smell.
If you don’t have a vacuum or extractor, this no-machine routine can still remove surface dirt, hair, crumbs, light stains, and residue. It won’t pull years of sand from the carpet padding, but it can make the interior feel clean and usable again.
⚡ The TidyFormula™ Quick Answer
The Recommendation: Remove large debris by hand, dry-brush fabric toward one collection point, lift the pile with a dustpan, lint roller, or carefully tested tape, and finish with a low-moisture wipe. Blot cloth seats and carpet instead of soaking them.
What I Use For This Job
Using the right tools saves time and protects your belongings. Here are my exact recommendations:
*As an Amazon Associate, TidyFormula earns from qualifying purchases.
- The Mix: 2 cups warm water and 3–5 drops of dish soap for colorfast cloth and carpet only
- Time: 25–60 minutes of cleaning, plus drying time
- Effectiveness: Medium-High for surface debris and everyday grime; limited for dirt embedded in carpet padding
What You Can—and Can’t—Do Without a Vacuum or Extractor
Set realistic expectations before you start.
You can:
- remove loose dirt, crumbs, hair, and surface dust
- clean light stains and everyday grime from colorfast cloth seats
- wipe sticky residue from carpet and hard surfaces
- remove the source of many minor food and stale-air odors
You probably won’t:
- pull deeply embedded sand from carpet padding
- remove every old or set-in stain in one pass
- fix an odor caused by liquid trapped under the carpet or inside seat padding
- safely clean mold, flood damage, or heavily soaked upholstery with towels alone
A careful surface clean is still worthwhile. The key is to remove dry debris before introducing moisture.
Prepare the Car Before Cleaning
- Park in a shaded, ventilated place. Upholstery cleaner can dry unevenly on hot seats, and direct sun may make glass cleaner streak.
- Let interior surfaces cool. Do not clean a dashboard, screen, or seat that is hot to the touch.
- Remove personal items and trash. Check cup holders, seat-back pockets, door pockets, and the spaces under the seats.
- Take out removable mats. Keep fabric and rubber mats separate because they need different cleaning and drying methods.
- Identify the seat material. The cloth-cleaning method below is not intended for leather, suede, faux suede, Alcantara-style material, or an upholstered headliner.
- Test first. Apply any cleaner to a hidden area and blot with a white towel. Stop if the color transfers, the texture changes, or a visible ring develops.
Clean from the top down so dust from the dashboard and seat backs does not fall onto a floor you already cleaned.
Tools You’ll Need (Cheap Stuff That Actually Works)
- Microfiber towels (at least four: damp cleaning, rinsing, drying, and glass)
- Stiff nylon brush for durable carpet
- Softer upholstery brush for cloth seats and delicate fabric
- Small hand brush and dustpan for collecting loosened debris
- Lint roller or wide packing tape for hair and fine crumbs
- Spray bottle
- Dish soap used in a very small amount
- Isopropyl alcohol (70%), optional for the inside glass only
- Two buckets or bowls, one for clean water and one for rinsing dirty towels
- Optional: rubber gloves and a clean rubber squeegee for pet hair
Do not use the same towel on upholstery, glass, screens, and greasy door jambs. Transferred residue is a common cause of streaks and dull-looking fabric.
How to Clean Floors and Carpet Without a Vacuum
This “brush and lift” routine works by loosening dry material, moving it to one place, and physically picking it up before wiping the carpet.
Step 1: Remove and empty the mats
Take the floor mats outside. Shake fabric mats vigorously, bend them slightly, and tap their backs together to dislodge gravel and crumbs. Avoid beating mats against painted bodywork or anything sharp enough to damage the backing.
For rubber or all-weather mats, shake off loose debris first. If needed, wash them separately with water and a few drops of dish soap, rinse thoroughly, and air-dry. Do not apply a glossy dressing because a slippery driver’s mat can interfere with safe pedal use.
Step 2: Pick up large debris by hand
Remove coins, wrappers, leaves, stones, and large crumbs before brushing. Check around seat tracks carefully; their edges can be sharp, and forcing debris into the mechanism can make the seats harder to move.
Step 3: Dry-brush the carpet toward a collection point
Do not spray the carpet yet. Use short, overlapping strokes and brush toward one corner or open door. A small hand brush works well around seat rails and along plastic trim.
Use firm pressure on durable floor carpet, but reduce pressure if the carpet starts to fuzz, shed fibers, or develop visible brush marks. Collect each pile with a dustpan or folded piece of stiff cardboard instead of redistributing it around the floor.
Step 4: Lift hair and remaining grit
Run a lint roller over the carpet after brushing. For pet hair, a slightly damp rubber glove or clean rubber squeegee can gather hair into removable clumps.
If you use packing tape, wrap it around your hand with the sticky side out and dab rather than dragging. Test it in a hidden spot first. Stop if it leaves adhesive, pulls carpet fibers, or affects the color. Do not use strong tape on leather, headliners, screens, or soft-touch trim.
Step 5: Wipe the carpet with controlled moisture
For colorfast automotive carpet, mix:
- 2 cups warm water
- 3–5 drops dish soap
Do not add alcohol, bleach, vinegar, fabric softener, or another cleaner to this solution.
Lightly mist a microfiber towel rather than spraying the floor directly. Wipe a small section, then blot it with a dry towel. For sticky areas, hold the damp towel against the spot for a minute before blotting instead of saturating the carpet.
Follow with a separate towel lightly dampened with plain water to pick up soap residue. Then press firmly with a dry towel. The carpet should feel barely damp, not wet or squishy.
What to do about stubborn sand
Brush in several directions, collect what rises, and repeat. On removable fabric mats, brushing the back while holding the mat upright can help dislodge particles. If sand continues appearing after several passes, it is probably embedded below the surface and will require a vacuum for complete removal.
How to Clean Cloth Car Seats Without an Extractor
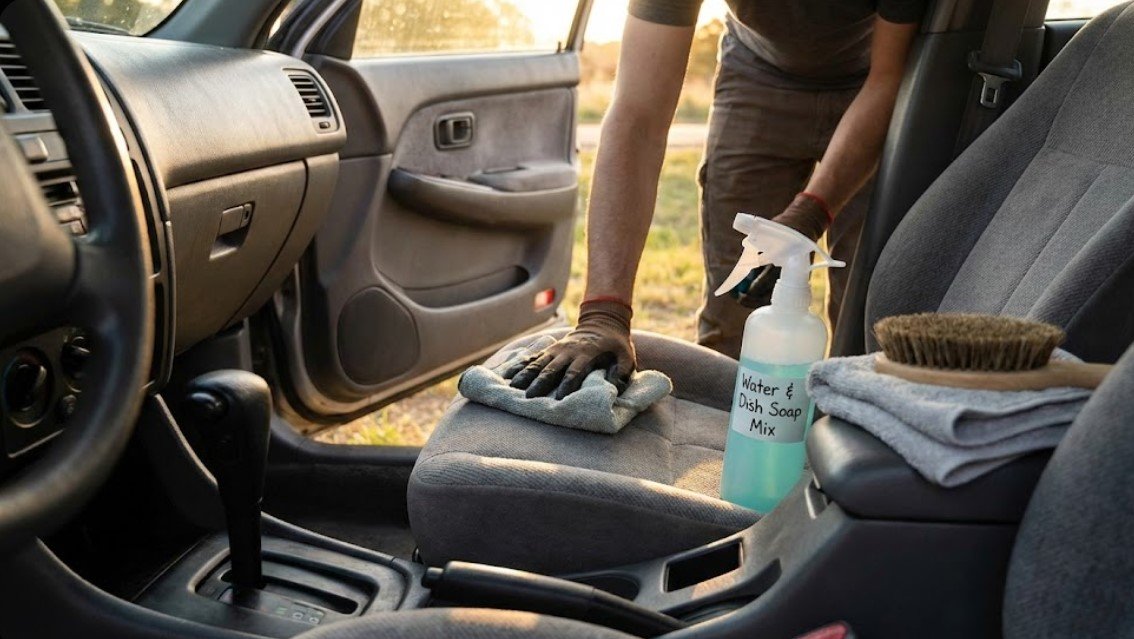
Without an extractor, the safest approach is controlled moisture: loosen dry debris, clean small sections, and immediately remove as much moisture as possible with dry towels.
Step 1: Dry-brush seams and creases
Brush seat seams, piping, and the gap between the seat back and cushion. Direct loosened crumbs toward an area where you can collect them with a hand brush, lint roller, or towel.
Use a softer brush on seat fabric than on floor carpet. Stop if the material begins to pill, fuzz, or snag.
Step 2: Spot-test the cleaner
Lightly dampen a white microfiber towel with the soap-and-water mixture and blot a hidden section. Allow the test spot to begin drying before deciding whether to continue.
Use plain water only if color transfers to the towel. If plain water also causes transfer, visible distortion, or a ring, stop and consult the vehicle’s care instructions or a professional detailer.
Step 3: Clean one small section at a time
Spray the cleaner onto the towel, not directly onto the seat. Wipe a section roughly the size of a sheet of paper, working with light, overlapping strokes. Immediately press a dry folded towel against the area to absorb moisture.
Repeat this rhythm: damp wipe, plain-water wipe, dry blot. Frequently turn to a clean side of the towel so you do not spread soil back onto the fabric.
Be especially conservative around perforations, electrical seat controls, heating or ventilation components, and side bolsters marked with an airbag label. Do not flood seams or allow liquid to run inside the seat.
Step 4: Treat stains without aggressive scrubbing
For a dried drink or food spot:
- blot the area with the lightly dampened cleaning towel
- allow it to sit for 3–5 minutes without letting it dry completely
- press firmly with a folded dry towel
- repeat once or twice if the stain continues transferring
- finish with a plain-water towel and blot dry
Work from the outside edge of the stain toward the center to avoid spreading it. Clean slightly beyond the visible edge so the treated area dries evenly.
Do not scrub until the fabric becomes fuzzy. If an oily stain remains, use one automotive upholstery product specifically labeled for that material and follow its directions. Do not layer it over another cleaner; remove the first product and let the area dry before changing methods.
Stop or adjust if you notice these signs
- color transferring heavily onto the towel
- fabric becoming fuzzy, rough, or distorted
- a water ring expanding as you work
- liquid reaching seat seams or dripping beneath the seat
- a musty odor getting stronger as the upholstery becomes damp
If any of these occur, stop adding moisture and blot with dry towels. Open the doors or windows and allow the area to dry before reassessing it.
Material-Specific Guidance
Leather and coated synthetic leather
Do not use the stiff brush or the cloth-seat mixture automatically. First wipe loose dust away with a dry microfiber towel. Then use a cleaner specifically labeled for the seat material and follow the product and vehicle instructions.
Avoid saturating perforated leather, seams, and airbag areas. Do not use isopropyl alcohol on leather because it may affect the finish.
Suede, faux suede, and Alcantara-style surfaces
These materials can develop water marks or texture changes. Use only a method approved by the vehicle or material manufacturer. Do not apply dish soap, packing tape, or a stiff carpet brush.
Headliners
Headliners are attached with adhesive that can weaken when soaked. Remove loose dust with a clean, dry microfiber towel or a very soft brush. For a spot, lightly dampen the towel—not the headliner—and blot gently. Stop if the fabric sags, separates, or changes texture.
Plastic, vinyl, controls, and screens
Use a dry microfiber towel first. For ordinary plastic or vinyl, follow with a towel barely dampened with water and dry immediately. Spray nothing directly into buttons, vents, speaker openings, seat controls, or switches.
Use the vehicle manufacturer’s recommended method for touchscreens, gauge lenses, and glossy trim. Alcohol and household glass cleaner can damage some coatings. Avoid glossy or slippery products on the steering wheel, gear selector, pedals, or driver’s floor mat.
How to Refresh Cloth Seats That Smell “Used”
Odor usually returns if the source remains, so check under the seats, inside pockets, around cup holders, and beneath removable mats before adding fragrance.
- Remove all crumbs and debris.
- Wipe the seats with minimal cleaner.
- Follow with a plain-water towel to remove residue.
- Blot thoroughly with dry towels.
- Leave the doors or windows open in a secure, ventilated area until the fabric is fully dry.
Without a vacuum, avoid sprinkling loose baking soda over cloth seats or carpet. Fine powder can remain in the weave, collect in seams, and become difficult to remove by hand.
If the odor is strongest when the fan runs, the source may be in the ventilation system or cabin air filter rather than the seats. If it is strongest near one floor area, check for damp carpet or an old spill.
🧪 Why the Method Works
Dry brushing frees crumbs, dust, hair, and grit caught between carpet or upholstery fibers. A dustpan, lint roller, or tested piece of tape then removes that loosened material instead of pushing it deeper.
The small amount of dish soap helps a damp towel pick up light oily residue, while the plain-water pass removes leftover soap. Blotting transfers moisture and soil into the towel without flooding the padding.
In practical terms: loosen the dry debris, lift it away, wipe the residue, rinse lightly, and blot dry.
How to Clean the Inside Windshield Without Streaks
Inside glass often develops a hazy film that becomes obvious in direct sun. Too much product and a dirty towel make the problem worse.
The no-streak windshield method
- Use two clean microfiber towels: one for cleaning and one for buffing.
- Mix 1 cup water with 1 tablespoon 70% isopropyl alcohol. Distilled water can help if tap water leaves mineral spots.
- Check the care instructions first if the glass has aftermarket tint or another applied film.
- Lightly mist the cleaning towel, not the glass or dashboard.
- Wipe the glass left to right.
- Turn to a clean side and wipe up and down.
- Immediately buff with the second dry towel until the haze disappears.
If the dry towel drags or leaves smears, switch to a clean side. Do not use the glass towel on the dashboard, upholstery, or other surfaces first.
Reality Check: When This Method Won’t Work
A no-machine cleaning method has limits. Stop and use a vacuum, extractor, or professional service when:
- carpet is packed with years of sand or fine gravel
- a large spill has soaked into seat foam or carpet padding
- the carpet feels wet beneath the surface
- a musty odor returns after the visible fabric dries
- you see suspected mold growth or evidence of floodwater
- seat fabric continues bleeding color during a spot test
- an odor suggests spoiled food or liquid is trapped beneath fixed trim
Borrowing or renting a machine once may be more practical for deep contamination. After the embedded material is removed, the no-machine routine works well for maintenance.
Drying and Reassembly
- Press out moisture. Use dry towels on seats and carpet until they stop picking up noticeable moisture.
- Ventilate the interior. Leave doors or windows open in a secure area. Air movement is more important than adding fragrance.
- Check seams and padding. The surface may feel dry while moisture remains around seams or underneath a mat.
- Wait before reinstalling mats. Both the floor and mats should be completely dry. Damp mats can trap odor and moisture against the carpet.
- Return the seats to a safe position. Make sure no towel, tape, brush, or debris remains near the pedals or seat tracks.
Do not close the car for long-term storage while upholstery is still damp. If the interior remains damp after several hours of ventilation, use stronger airflow or seek professional help rather than adding more cleaner.
One Practical Pro Tip That Saves Future Work
Keep a mini lint roller, small microfiber towel, and trash bag in the glove box or trunk. Lift crumbs before they are stepped into the carpet, and blot spills before they reach the padding. Store cleaning liquids outside the passenger compartment unless their containers are designed to tolerate vehicle heat and are secured upright.
FAQ
1) How do I clean the interior of a car without a vacuum if pet hair is everywhere?
Remove loose crumbs first. Use a slightly damp rubber glove or clean rubber squeegee to gather hair into clumps, then pick up the clumps with a lint roller. Finish with a soft brush and repeat. Test tape before using it because strong adhesive can pull fibers or leave residue.
2) How do I clean a car interior without an extractor after a spill?
Blot immediately with dry towels—do not rub the spill outward. Apply a small amount of plain water or a material-safe cleaner to a towel, blot again, and press with fresh dry towels. If liquid reached the padding, the area remains wet, or the odor returns after drying, hand blotting is not enough.
3) Can I use laundry detergent on cloth seats?
Laundry detergent is difficult to rinse from seat fabric without an extractor and may leave residue that attracts dirt. Use only a few drops of dish soap in water for colorfast cloth, or choose one automotive upholstery cleaner labeled for the material. Do not combine them.
4) Why is my inside windshield always streaky?
The usual causes are excess product, a contaminated towel, or cleaner drying before it is buffed. Mist the towel rather than the glass, work on cool glass, and use a separate dry microfiber towel for the final buff.
5) What is the fastest “good enough” interior clean with no machines?
Remove and shake the mats, pick up large debris, brush seats and floors toward one collection point, collect the pile with a dustpan or lint roller, wipe sticky areas, and clean the inside windshield. Skip wet-cleaning the entire interior unless you have enough time to let it dry fully.
Everything Mentioned Above
Before you leave, grab the tools you need to get the job done right the first time:
*As an Amazon Associate, TidyFormula earns from qualifying purchases.