
How to Remove Limescale from Bathroom Faucets
To remove limescale from bathroom faucets without damage, start with a soft cloth, warm water, and mild dish soap, then use a faucet-safe descaler only where mineral buildup remains. Avoid abrasive pads, harsh powders, and prolonged contact with acidic cleaners, especially on matte black, gold, bronze, or unknown finishes.
Limescale often collects around the faucet base, handle seams, spout tip, and aerator. It can look chalky white, crusty, or cloudy, but some dull spots may be permanent finish damage rather than removable mineral residue.
⚡ The TidyFormula™ Quick Decision
Best approach: Wash the faucet first, then use a manufacturer-approved limescale cleaner or a carefully controlled vinegar treatment only if the faucet finish can tolerate it.
Use caution with: Acidic cleaners can dull or discolor specialty finishes, plated surfaces, natural stone counters, and damaged coatings.
Replace instead of cleaning if: The finish is flaking, deeply pitted, cracked, or the faucet is leaking around the handle or base.
What I Use For This Job
Using the right tools saves time and protects your belongings. Here are my exact recommendations:
*As an Amazon Associate, TidyFormula earns from qualifying purchases.

Check the faucet finish before using a descaler
The best way to remove limescale from bathroom faucets depends more on the finish than on the thickness of the buildup. Standard chrome and stainless steel are usually more forgiving than decorative or coated finishes, but the faucet manufacturer’s care instructions should take priority.
- Chrome or stainless steel: Usually suitable for gentle cleaning and careful spot treatment, provided the surface is intact.
- Brushed nickel: Use a soft cloth and follow the manufacturer’s instructions. Avoid scrubbing in random directions, which can make the grain look uneven.
- Matte black, gold, bronze, brass, or colored finishes: Treat these as delicate unless the manufacturer specifically permits a limescale remover. Mild soap and water are the safer starting point.
- Damaged or peeling finishes: Do not use acidic cleaners or abrasives. Cleaning may make the damaged area more noticeable.
- Natural stone countertops: Protect nearby marble, limestone, travertine, and other stone from vinegar or acidic descaler. These products can mark sensitive stone surfaces.
If you do not know the finish, use mild dish soap and water first. Test any stronger cleaner on a small, less visible area and stop if the surface loses shine, changes color, or feels rougher.
What you need
- A soft microfiber cloth for washing and drying the faucet
- A soft toothbrush or small nylon cleaning brush for seams and around the base
- Mild dish soap
- Warm water
- A faucet-safe limescale remover, if approved for your finish
- White vinegar for cautious spot treatment on compatible finishes only
- Paper towels or an old cloth to protect the countertop and catch drips
Do not use steel wool, scouring powder, rough scrub pads, razor blades, or a knife to scrape deposits. These can scratch chrome, wear through plated finishes, and leave dull marks that look worse than the original limescale.
Remove mineral buildup in layers
Start with the mildest method that can work. Removing surface soap residue first lets you see where actual limescale remains and reduces the urge to scrub too hard.
- Protect the surrounding counter. Lay a towel around the faucet base, especially if you have natural stone or a surface that could be affected by drips.
- Wash the faucet with mild soap and warm water. Dampen a microfiber cloth, add a small amount of dish soap, and wipe the spout, handles, base, and drain area. Use light pressure rather than aggressive rubbing.
- Rinse and dry the surface. Wipe away soap with a separate damp cloth, then dry the faucet. This reveals chalky mineral buildup that did not come off during the basic wash.
- Apply a finish-safe limescale cleaner to the cloth, not directly to the faucet. Follow the current product label. Keeping cleaner on the cloth gives you more control and helps prevent it from running into seams, under handles, or onto the countertop.
- Work on small areas. Hold the dampened cloth against the mineral deposit only as long as the product label or faucet manufacturer permits. Do not leave cleaner sitting on the faucet while you clean another part of the bathroom.
- Loosen residue gently. Wipe with the cloth or use a soft toothbrush around the faucet base and handle seams. For brushed finishes, move with the visible grain rather than across it.
- Rinse thoroughly and dry immediately. Remove all cleaner residue with a clean damp cloth, then buff dry with microfiber. Check the surface in good light before repeating the treatment.

🧪 Why This Works
Limescale is a mineral deposit left behind as water evaporates. Mild soap removes the oils and soap film that can cover it, while a suitable limescale cleaner helps loosen the mineral layer. Gentle wiping afterward is safer than trying to grind the deposit off with an abrasive tool.
Use vinegar only as a controlled spot treatment
White vinegar is commonly used for mineral deposits, but it is not automatically a safe cleaner for limescale from every bathroom faucet. Use it only if your faucet manufacturer allows acidic cleaning or if you have confirmed that the finish is compatible.
For a compatible chrome or stainless-steel faucet, dampen a cloth with vinegar rather than soaking the entire fixture. Press the cloth against the affected spot briefly, wipe gently, then rinse the area well and dry it. Do not wrap a vinegar-soaked paper towel around a faucet, leave it in place unattended, or let vinegar sit around the faucet base.
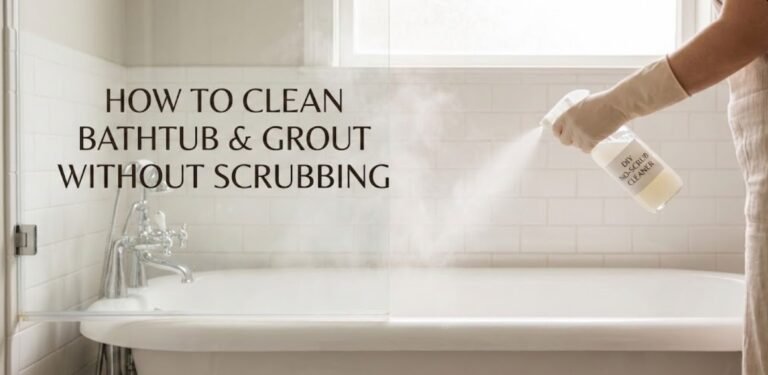
Avoid vinegar on unknown decorative finishes, damaged plating, natural stone, and surrounding grout unless you know those materials can tolerate it. If mineral residue extends onto the tub surround or tile, use a surface-appropriate method instead, such as this bathtub and grout cleaning method.
Clean the aerator separately if the water flow is uneven
A crusty faucet tip or uneven stream can mean mineral buildup is collecting in the aerator. Removing it may help, but only if you can do so without forcing or scratching the spout.
- Cover the drain before removing any small part.
- Check whether the aerator can be unscrewed by hand. If it needs a tool, protect the finish with a cloth and use minimal force.
- Keep the parts in order so you can reassemble them correctly.
- Rinse away loose debris and clean the aerator according to the faucet manufacturer’s instructions.
- Reinstall it carefully by hand first. Do not overtighten.
Stop if the aerator is seized, the finish begins to mark, or the faucet has a hidden-style aerator that requires a specific key. Forcing the part can damage the spout threads or leave the faucet with a poor seal.
Common limescale cleaning mistakes
Scrubbing with an abrasive pad
A rough pad may remove some buildup quickly, but it can leave fine scratches that make chrome look hazy and allow future deposits to cling more easily. Switch to microfiber, a soft nylon brush, and repeated gentle treatments instead.
Leaving cleaner on too long
Long contact time is not always better. If the finish starts looking uneven, dull, cloudy, or lighter in one spot, rinse immediately and stop using that product. The remaining mark may be finish damage rather than limescale.
Spraying cleaner directly into seams
Cleaner can collect where the faucet meets the counter or around handle bases. Apply it to a cloth instead, then wipe the affected area with control. Follow with a clean damp cloth to remove residue from crevices.
Trying to remove pitting as though it were scale
Pitting looks like tiny dark dots, rough pinholes, or permanent dull patches in the metal finish. If the surface feels rough after deposits are gone, more descaler may not fix it. Continued scrubbing can make the damage more visible.
Prevent limescale from returning
The simplest prevention step is drying the faucet after use. A quick wipe of the spout, handles, and base removes water droplets before they can leave a new mineral ring. Pay extra attention to the flat ledge around the faucet base, where water often sits unnoticed.
Clean light buildup regularly rather than waiting for a thick crust to form. A mild soap-and-water wipe is usually enough for routine care and is less likely to affect the finish than repeated stronger treatments. If you are refreshing the rest of the vanity area, this mirror cleaning method without glass cleaner can help you avoid overspray around the faucet.
Frequently Asked Questions
Can you use baking soda on bathroom faucets?
Baking soda is mildly abrasive, so it is not the best first choice for finished faucets. It may scratch or dull delicate coatings when rubbed into a paste. Use mild soap, a soft cloth, and a finish-compatible limescale cleaner instead.
Why does the faucet still look cloudy after cleaning?
Cloudiness can be leftover mineral film, cleaner residue, fine scratches, or finish wear. Wipe the faucet with a clean damp cloth and dry it completely before judging the result. If the cloudiness does not change and feels smooth, it may be permanent finish damage.
Can limescale damage a faucet?
Heavy buildup can make a faucet look dull and may interfere with small removable parts such as an aerator. The greater immediate risk often comes from harsh removal methods that scratch or discolor the finish. Use gentle cleaning before escalating to stronger products.
For most bathroom faucets, mild soap, controlled use of a finish-safe descaler, and thorough drying are the safest routine. Avoid abrasive tools and prolonged acidic treatments, especially on specialty finishes, and treat persistent roughness or peeling as a repair or replacement issue rather than a cleaning problem.
Everything Mentioned Above
Before you leave, grab the tools you need to get the job done right the first time:
*As an Amazon Associate, TidyFormula earns from qualifying purchases.


One Comment