
How to Clean a Laptop Fan Without Opening the Laptop
You can clean a laptop fan without opening the laptop, but only for light to moderate dry dust. Shut the laptop down completely, unplug it, keep the fan from spinning only if you can clearly see and safely reach it, and use short bursts of compressed air through the vents. Keep every tool outside the grille and stop immediately if liquid propellant appears.
Quick Answer
The safest external method: Turn the laptop off completely, prevent the fan from spinning through the vent only if it is clearly visible and reachable, and use short, controlled bursts of compressed air. An optional vacuum nozzle held near the exhaust can catch loosened dust, but it should never touch the laptop.
- Best tools: Compressed air can, flashlight, optional vacuum with a narrow nozzle, and a thin plastic stick.
- Time: Usually a short session for a light dry-dust pass, longer if you need to wait for propellant residue to clear.
- Best for: Light to moderate dry dust buildup.
- Not suitable for: Grinding fans, sticky residue, severe overheating, or vents with no safe access to the fan.
Cleaning a laptop fan from the outside is a maintenance method, not a repair method. It can improve airflow when dry dust is blocking the vents or heatsink fins, but it will not fix a damaged fan, worn bearings, dried thermal paste, or an internal dust mat that cannot pass through the grille.
Before cleaning, check the laptop manufacturer’s support page or manual for vent locations and model-specific cautions. Laptop designs vary: some use hidden intake vents near the hinge, and openings for speakers, microphones, and ports can look similar to ventilation slots.
What You Need
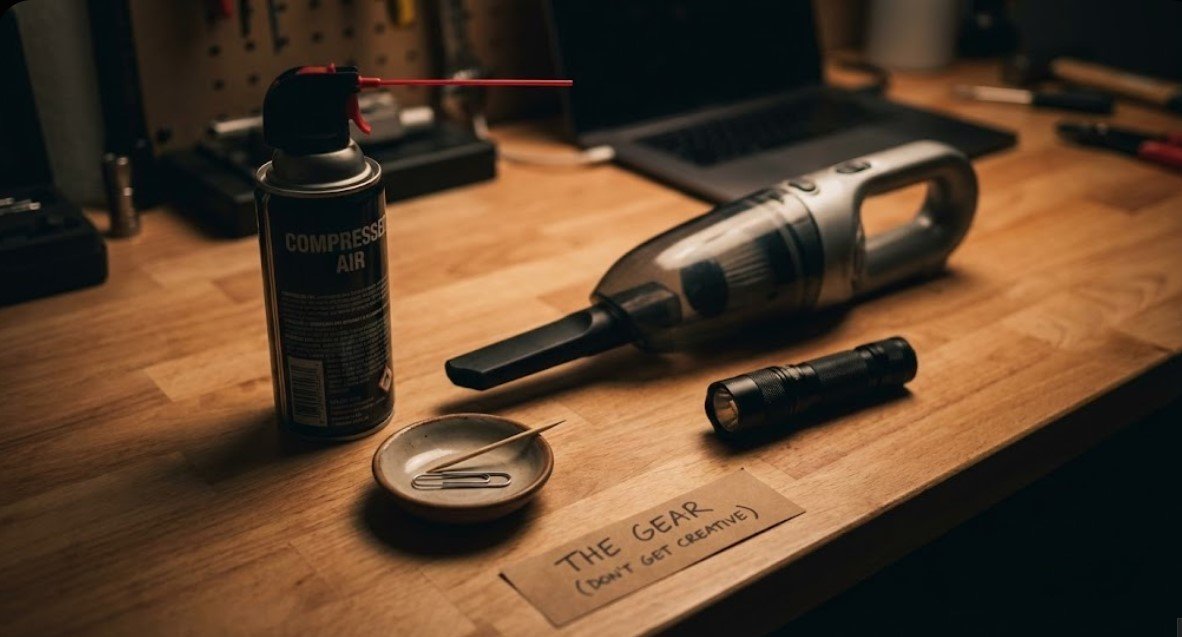
Gather these items before starting a laptop fan dust cleaning session:
What I Use For This Job
Using the right tools saves time and protects your belongings. Here are my exact recommendations:
*As an Amazon Associate, TidyFormula earns from qualifying purchases.
- Compressed air can: Use one with a narrow straw for controlled airflow. Follow the handling and distance instructions printed on the can.
- Vacuum cleaner: Preferably one with a hose, crevice attachment, and adjustable suction. Keep the nozzle outside the laptop and avoid contact with the case or internal parts.
- Toothpick or thin plastic stick: To keep a clearly visible fan from spinning while you clean. A smooth plastic tool is preferable because a wooden toothpick can splinter.
- Flashlight: To help you identify vents and see whether the fan is safely accessible.
- Clean, hard work surface: Avoid beds, carpets, blankets, and other surfaces that shed fibers or block vents.
Before You Start
- Save your work and shut the laptop down completely. Do not use sleep or hibernation mode.
- Unplug the charger, docking station, USB devices, and other connected accessories.
- Remove the battery if your model has a removable one. Do not attempt to remove a sealed internal battery without opening the laptop.
- Let a hot laptop cool to room temperature before cleaning it.
- Move to a well-ventilated area because dust may come out of the vents.
- Place the laptop on a stable, dry surface where you can reach the bottom, side, and rear vents.
Confirm That Dust Is the Likely Problem
External cleaning is most useful when the vent grille looks dusty, airflow feels weaker than it used to, or fan noise gradually increased over time. Do not assume dust is responsible if the fan suddenly started grinding, clicking, or scraping. Those sounds usually require inspection or replacement rather than stronger airflow.
Step-by-Step: How to Clean Laptop Vents Safely
1. Identify the Intake and Exhaust Vents
Many laptops pull cooler air in from the bottom or side and push warm air out through a rear, side, or hinge-area exhaust vent, though exact placement varies by model. Use a flashlight to locate the openings and visible fan housing.
Do not spray into USB ports, charging ports, card slots, speaker grilles, microphone openings, or the keyboard. If you cannot distinguish the vents, consult the model’s manual before continuing.
2. Position the Laptop
Set the laptop on its side or at an angle that gives you access to both the intake and exhaust without resting its weight on a fragile display hinge. Keep the compressed-air can upright throughout the cleaning process rather than rotating the can to match the laptop.
3. Hold the Fan Still
This is the most important step. If you can clearly see and safely reach a fan blade through a wide vent, gently use a thin plastic stick or toothpick to stop the blade from moving. Apply only enough pressure to prevent rotation.
Do not push the tool deep into the laptop, bend a blade, pry against the grille, or probe blindly for the fan. If the fan is hidden behind a fine mesh or cannot be reached without force, leave it alone. Use only gentle, off-center bursts across the vent, or arrange professional internal cleaning if substantial dust remains.
4. Place the Vacuum Near the Exhaust
If you use a vacuum, select low suction when possible and hold the nozzle near the exhaust vent. Do not press it against the grille or use it to pull directly on a fan that you cannot immobilize.
The vacuum is optional. Its purpose is to collect airborne dust outside the chassis, not to suck dust through the laptop by itself. Keeping the nozzle from touching the computer also reduces the risk of cosmetic damage or an accidental static discharge.
5. Use Short Bursts of Compressed Air
Keep the can upright and position the straw just outside the vent rather than inserting it into the laptop. Spray short bursts of about one second each, pausing between bursts so you can see whether dust is moving and prevent the fan from accelerating.
Start with the intake vent while collecting dust near the exhaust. Avoid sealing either vent with the straw or vacuum nozzle because displaced air and dust need an open path out.

6. Repeat From Different Vent Angles
After a few bursts, shift the straw slightly and repeat. Dust often collects in corners, around the heatsink fins, and near the fan housing. Use several gentle passes rather than increasing the pressure or holding the trigger continuously.
You can also direct a few bursts across the exhaust vent to loosen dust at the outer grille. Do not repeatedly force a visible clump deeper into the laptop. If a clump moves inward or remains trapped behind the grille, stop and have the laptop opened for proper removal.
7. Inspect the Vents and Remove Surface Dust
Use the flashlight to check the grille. Wipe dust from the exterior case with a dry, lint-free cloth. Do not push a cotton swab, brush, or cloth through the openings, where fibers can snag on the fan.
8. Let the Laptop Rest, Then Power It On
After a dry cleaning pass, wait several minutes before reconnecting the charger or turning the laptop on. If you saw liquid, frost, or dampness from the compressed-air can, stop immediately and leave the laptop powered off until all visible moisture has completely evaporated and the laptop has returned to room temperature.
Once powered on, listen for normal fan operation and check that warm air exits the exhaust during ordinary use. Improvement may be gradual as the laptop adjusts fan speed to its workload.
Why Short Bursts Work Better
Packed dust can form a felt-like layer around the grille and heatsink fins. Short, repeated bursts loosen small sections while giving displaced dust time to leave through an open vent. They also provide more control than a continuous blast and make it easier to stop if the fan moves or liquid propellant appears.
Stop Immediately If You Notice These Signs
- The fan starts spinning rapidly: Release the air trigger and reposition the laptop or fan-holding tool.
- Liquid or white frost appears: Stop spraying, keep the laptop off, and allow it to dry completely.
- A tool slips through the grille: Do not shake the laptop or continue probing. Retrieve it only if it is loose and safely reachable; otherwise, arrange service.
- The fan blade bends or resists movement: Stop rather than applying more force.
- Dust remains packed behind the grille: Stronger pressure may force the blockage deeper. Internal cleaning is the safer next step.
- You smell burning or see damage: Do not power the laptop on. Disconnect it and have it inspected.
Mistakes to Avoid
- Do not let the fan spin freely: A fan spinning at uncontrolled high speed from airflow alone can put extra strain on its bearings.
- Do not insert the compressed-air straw: Keep it outside the vent so it cannot strike the fan or another component.
- Do not put a vacuum nozzle against the laptop: Direct contact, strong suction, and uncontrolled fan rotation can cause damage.
- Do not use a hair dryer: Hot air can damage plastic parts, while an unfiltered cool setting may blow dust and hair deeper into the machine.
- Do not blow with your mouth: Exhaled air contains moisture that should not be introduced into electronics.
- Do not use an industrial air compressor, leaf blower, or high-powered shop blower: The pressure is difficult to control and may carry moisture or debris.
- Do not spray cleaners or water into a vent: External fan cleaning should remain dry.
- Do not clean while the laptop is running: Always shut it down fully and disconnect power first.
Troubleshooting After Cleaning
The Fan Is Still Loud
Give the laptop a few minutes to finish startup activity. If the fan remains loud during light use, check that the laptop is on a hard surface and that no vent is blocked.
Persistent grinding, rattling, clicking, or buzzing suggests a worn bearing, loose part, or damaged fan. Compressed air will not correct those problems.
Little or No Dust Came Out
The laptop may already be relatively clean, or dust may be packed into an internal layer that cannot pass through the vent. Do not compensate with longer blasts or higher-pressure equipment. Internal service is more appropriate if airflow remains weak.
The Laptop Still Runs Hot
High temperatures can be caused by blocked internal heatsink fins, a failing fan, dried thermal compound, demanding software, or a blocked air path. Confirm that the vents are unobstructed and close unnecessary high-load programs. If the laptop continues to throttle, shut down, or become unusually hot, have it inspected.
The Fan Does Not Run After Cleaning
Turn the laptop off again and disconnect power. Check that no stick, toothpick fragment, or visible debris remains in the vent. Do not continue operating a laptop that overheats with no exhaust airflow.
How Often Should You Clean a Laptop Fan?
For most people, checking and cleaning the vents every 3 to 6 months is enough as a general guideline. If you have pets, smoke indoors, use the laptop near fabric, or live in a dusty environment, inspect the vents more often and clean them every 1 to 3 months when buildup is visible.
Cleaning more often is not automatically better. Use compressed air only when needed, and stop once the grille is clear and airflow has improved.
How to Reduce Future Dust Buildup
- Use the laptop on a desk, tray, or other firm surface instead of a bed, couch, or blanket.
- Keep intake vents uncovered during use and storage.
- Remove visible dust from the exterior grilles with a dry, lint-free cloth.
- Keep the work area free of pet hair, lint, smoke, and greasy cooking residue.
- Do not store the laptop while it is hot or running inside a sleeve or bag.
- Keep compressed-air cans upright, capped, and stored according to their labels, away from heat.
When This Method Will Not Be Enough
External cleaning works best for routine maintenance. You will likely need internal servicing or repair if:
- The fan makes a grinding, rattling, clicking, or buzzing sound.
- The laptop overheats or shuts down even after cleaning.
- Airflow is still very weak after several gentle cleaning passes.
- The fan does not spin properly during startup or under load.
- Sticky residue from smoke, vapor, grease, or a liquid spill has built up inside the vents.
- A dense dust mat is visible but cannot pass through the grille.
- The laptop’s vent design prevents you from controlling the fan safely.
In those cases, opening the laptop according to its service instructions or visiting a repair technician is the better option. Opening some models may affect warranty coverage, so check your manufacturer’s specific terms before removing any panel.
how to clean an air fryer heating element safely.
FAQ
Can I clean a laptop fan without opening the laptop?
Yes, for basic dry dust removal. Compressed air can loosen light to moderate buildup through the vents, especially when you can safely prevent the fan from spinning. A dense internal blockage, sticky residue, or mechanical fan problem requires internal service.
Is it safe to use compressed air on a laptop fan?
It can be, when used carefully. Shut the laptop down, keep the can upright, follow its label, use short bursts, and prevent a visible fan from spinning. Keep the straw outside the grille and stop if liquid or frost appears.
Can I use a vacuum cleaner alone?
A vacuum may remove loose dust from the outside of a grille, but it usually cannot break up dust packed around the heatsink. If used, keep the nozzle outside the laptop, avoid direct contact, select low suction, and do not let the fan spin freely.
What if I cannot see or hold the fan?
Do not insert a tool blindly. Use only gentle, off-center bursts across the vent so the airflow is less likely to drive the fan at high speed. If airflow remains restricted, arrange internal cleaning rather than using stronger pressure.
What if the fan is still loud after cleaning?
A consistently fast fan can indicate continued heat buildup or heavy system activity. Grinding, clicking, rattling, or buzzing more often points to a worn or damaged fan. The laptop may need deeper cleaning, fan replacement, or other thermal servicing.