You can clean a PC without compressed air by shutting it down, unplugging it, loosening dust with a clean soft brush, and directing cool airflow out of the case. Hold every fan still while cleaning, keep liquids away from installed components, and never open the power supply. A hair dryer is optional and must produce completely cool air.
This method takes longer than canned air, but it works well for routine dust, pet hair, and clogged filters. The basic approach is simple: loosen the dust first, then move it out of the case without touching delicate connectors.
⚡ The TidyFormula™ Quick Answer
The Verdict: Use a clean, soft paintbrush to dislodge dust, then use a hair dryer on a verified cool-only setting to direct the loose dust out of the case. Never place a household vacuum nozzle against the motherboard or other internal components.
Best combination: Cool airflow, a soft artist brush, and a microfiber cloth for the empty case panels.
Best technique: Work from the top of the case downward and direct dust toward an open side.
If the dryer feels warm: Stop using it and continue with the brush alone.
How to Clean a PC Without Compressed Air: Preparation
Choose a dry, well-ventilated workspace with good lighting. A garage, covered patio, or hard floor is better than carpet. Avoid cleaning outdoors when it is damp, windy, extremely cold, or humid.
What You Need
A hair dryer with a true cool setting: Use low speed if available. The air must remain cool during continuous use.
A soft, clean paintbrush: A small watercolor or artist brush works for loose dust. Do not use a brush with paint, oil, metal ferrules that may scrape components, or shedding bristles.
A microfiber cloth: Use it on removed panels and the empty metal portions of the case, not across exposed circuit boards.
Turn the power supply switch at the back of the PC to the off position.
Unplug the power cable and all peripherals.
Press and hold the PC’s power button for about 10 seconds to help discharge residual power in the system.
Allow recently used components to cool before opening the case.
Remove the side panels and set them somewhere they cannot fall or be scratched.
Pressing the power button does not make the inside of the power supply safe to access. A power supply can retain hazardous voltage, so never remove its metal cover.
⭐ TidyFormula's Top Picks
What I Use For This Job
Using the right tools saves time and protects your belongings. Here are my exact recommendations:
*As an Amazon Associate, TidyFormula earns from qualifying purchases.
⚠️ Safety First: According to Intel, electrostatic discharge (ESD) can damage components. Work on a hard surface, avoid socks on carpet, touch an unpainted metal part of the chassis before reaching inside, and handle removable components by their edges. If you own an antistatic wrist strap, clip it to bare metal on the unplugged chassis.
How to Clean Inside a PC Without Compressed Air
The safest method is “loosen and evacuate.” The brush loosens dust attached to surfaces, while gentle, cool airflow carries it out of the case. Work from the top downward so you do not redeposit dust onto areas you already cleaned.
1. Remove Filters and Easy-to-Remove Panels
Take off removable front panels and dust filters before cleaning the electronics. Check how each filter is installed so it goes back in the same orientation. If you are not comfortable removing the graphics card, CPU cooler, or other components, leave them installed. Routine cleaning rarely requires a full teardown.
2. Loosen Dust With the Brush
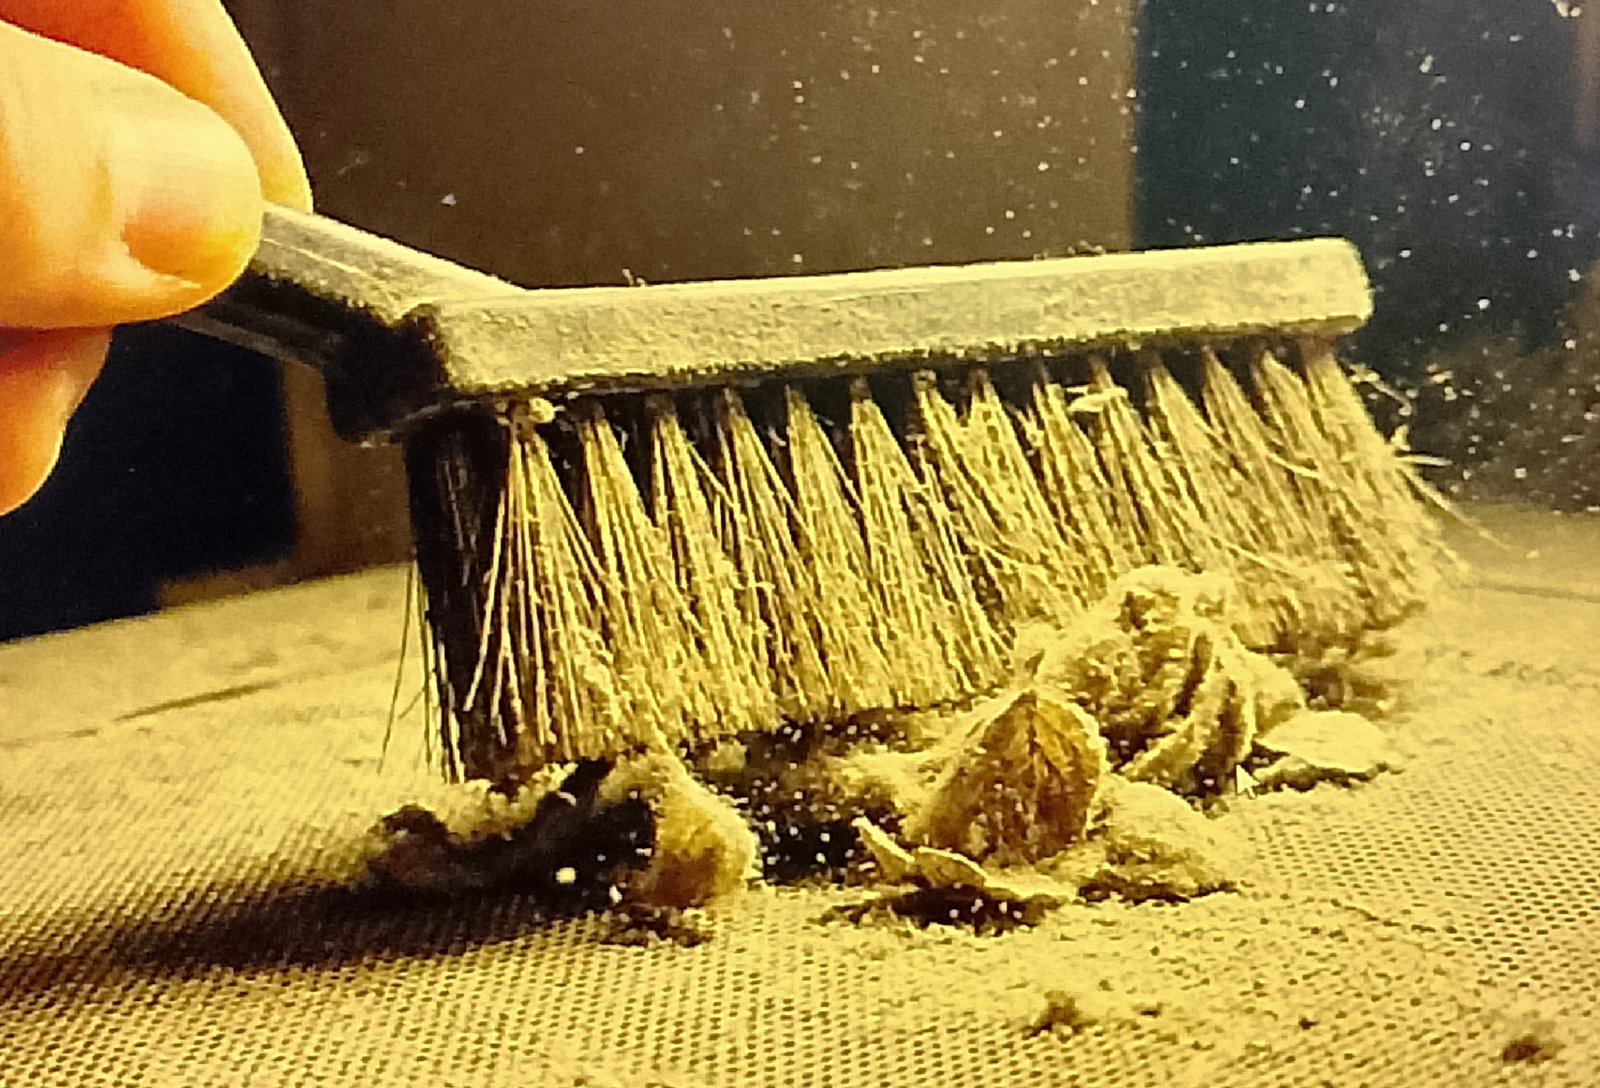
Use short, light strokes to loosen dust from the GPU backplate, RAM heat spreaders, case floor, fan frames, cable covers, and accessible heatsink surfaces. Guide the dust toward the open side of the case.
Do not push the brush into CPU sockets, RAM slots, PCIe slots, cable connectors, or underneath small board-mounted components. Avoid touching gold contacts. If the brush catches on something, stop and lift it away rather than pulling.
My experience: “You’ll see the dust clumping up as you brush. It’s oddly satisfying, like raking leaves.”
3. Move the Loose Dust Out
Before pointing a hair dryer into the PC, run it on the cool setting for at least 30 seconds and hold your hand in the airflow. If the air becomes warm, do not use it.
With the dryer on its lowest cool-only setting, hold the nozzle about 12 inches from the case. Use short passes to direct dust toward an open panel. Keep the dryer moving, and do not press the nozzle into heatsinks, slots, or fan openings.
If your dryer does not have reliable unheated airflow, skip this step. Continue loosening and lifting dust with the brush rather than blowing with your mouth, which can introduce moisture.
🚫 The Rookie Mistake: Do not place a household vacuum nozzle inside the case or against the motherboard. Static buildup, strong suction, and accidental nozzle contact can damage delicate parts. A vacuum is appropriate for the surrounding floor or a fully removed filter, not exposed circuitry. Electronics-safe ESD vacuums are specialized equipment and are different from household vacuums.
4. Clean Heatsinks and Radiators
Inspect the CPU heatsink, GPU heatsink, and any liquid-cooling radiator for compacted dust between the fins. Hold nearby fans still, then brush across the accessible face using light strokes. Direct cool airflow through the fins from both sides when possible.
Do not force a brush deep between thin metal fins or bend them. Do not remove the CPU cooler solely for routine dusting; removing it normally requires cleaning and replacing the thermal paste before reinstallation.
5. Clean the Power Supply Safely
Leave the power supply installed and keep its cover closed. Clean only its external grille, surrounding case area, and removable intake filter. Hold the visible fan still if you direct airflow through the grille, and do not insert a brush, pencil, or other object through the power supply openings.
How to Clean PC Fans Without Compressed Air
Do not allow a fan to free-spin while brushing it or directing air at it. Overspinning can stress the fan bearings, and moving blades make it harder to clean the caked dust along their edges.
Gently hold the fan by its center hub or steady one blade near the hub. Do not bend the blade.
Brush each blade from the hub toward the outer edge.
While still holding the blades stationary, use low, cool airflow to carry away loosened dust.
Turn the fan by hand afterward to confirm that it rotates freely without scraping.
A clean, dry toothbrush can help with stubborn grime on sturdy, removed plastic fan blades. Do not scrub exposed circuit boards or force a toothbrush behind an installed fan where it could catch a cable.
Fans continually pull airborne dust through the case. Fine particles collect on fan edges, heatsink fins, and textured surfaces, while humidity, airborne oils, and static charge can make the layer harder to dislodge. That is why gentle brushing often removes buildup that airflow alone leaves behind.
Cleaning Removable Dust Filters
Most modern cases have removable mesh filters at the front, top, or bottom. Clean a lightly dusty filter with a dry brush or vacuum it only after removing it and moving it well away from the PC.
Wash a filter only if it contains no electronics, wiring, foam that the manufacturer says must remain dry, or permanently attached case parts.
Remove loose dust outdoors or over a trash can.
Rinse the filter with warm water. A small amount of dish soap can be used for greasy residue.
Rinse away all soap.
Pat the filter with a clean towel without stretching the mesh.
Leave it in a ventilated area until it is completely dry, including its frame, corners, and magnetic edges. This may take several hours or overnight.
Never reinstall a filter that feels cool or damp. Do not use hot air to speed drying because heat can distort plastic frames or loosen adhesive.
Hot hair-dryer air: Heat can affect plastics, adhesives, and nearby components. Stop immediately if the airflow becomes warm.
Household vacuum nozzles on components: They introduce ESD, suction, and impact risks.
Leaf blowers: Their force is difficult to control, and they can propel dirt or moisture into the case and overspin fans.
Air compressors: Unless configured specifically for electronics, they may release excessive pressure, oil, or condensed moisture.
Wet cloths on electronics: Use microfiber only on removed panels and non-electronic case surfaces.
Cleaning sprays or household chemicals: Do not spray cleaners into the PC or apply them to installed circuit boards.
Blowing by mouth: Breath introduces moisture and does not provide controlled airflow.
When to Stop or Change Your Approach
Stop cleaning and inspect the PC if you notice any of the following:
The hair dryer produces warm air, an electrical smell, or visible debris from its nozzle.
Condensation or moisture appears anywhere on the case or components.
A brush snags a wire, connector, soldered component, or thermal pad.
A fan blade is cracked, loose, scraping, or difficult to turn.
You find a swollen battery, leaking component, scorch mark, or melted connector.
Dust is mixed with sticky liquid, insect residue, corrosion, or heavy smoke deposits.
Sticky contamination may require component removal and electronics-specific cleaning procedures. If you are not comfortable identifying and safely removing the affected part, use a qualified repair technician rather than adding liquid inside an assembled PC.
Reassembly and First Startup
Inspect the case for loose brush bristles, clumps of dust, dropped screws, and disconnected cables.
Confirm that fan cables, GPU power cables, motherboard power cables, and storage cables are firmly seated.
Make sure every fan turns freely and no cable crosses a fan blade.
Reinstall only completely dry filters.
Replace the side panels without trapping or pinching cables.
Reconnect peripherals and the power cable, then turn on the power supply switch.
Start the PC and confirm that the case, CPU, and GPU fans operate normally.
If the PC was cleaned in a cold outdoor area, let it return to room temperature in a dry location before reconnecting power. This reduces the risk of condensation.
If the PC Does Not Start
Turn it off, switch off the power supply, and unplug it again. Check the main motherboard power connector, CPU power connector, GPU power cable, RAM retaining clips, front-panel power connector, and any cable you may have moved. Do not repeatedly attempt to power on a system with a burning smell, sparking, or visible damage.
How to Keep the PC Cleaner
Keep the tower on a desk or solid stand rather than directly on carpet.
Leave clearance around all intake and exhaust vents.
Clean removable filters before they become visibly blocked.
Avoid smoking or vaping near the PC because airborne residue makes dust harder to remove.
Keep the surrounding floor and desk free of pet hair and lint.
Make sure all intended intake locations have properly fitted filters.
You do not need to remove every speck of dust. Concentrate on restoring airflow through filters, fans, heatsinks, and radiators without disturbing sockets or delicate board components.
FAQ
Can I use a vacuum cleaner inside my PC?
Do not use a household vacuum nozzle on the motherboard, graphics card, RAM, or other exposed electronics. It can create static, pull on small parts, or strike components. You can vacuum a fully removed dust filter away from the computer or use the vacuum on the surrounding floor.
Is a hair dryer safe for PC cleaning?
It can be used cautiously only if it has a reliable cool-only setting. Test the airflow first, select low speed, remain about 12 inches away, hold the fans still, and keep the dryer moving. If the air becomes warm, stop and use the brush without the dryer.
Can I use a leaf blower?
No. A leaf blower is unnecessarily powerful for exposed electronics and may propel grit or moisture into the case, damage connectors, and overspin fans. Use gentle, controlled airflow instead.
Is it safe to use a toothbrush?
A clean, completely dry, soft toothbrush is useful for sturdy plastic fan blades and removable filters. Avoid using it aggressively on circuit boards, sockets, contacts, or small soldered components.
How often should I clean my PC?
Inspect the filters monthly at first and adjust based on what you find. PCs on the floor, in carpeted rooms, or around pets usually need attention more often than systems kept on a clean desk. Clean the interior when filters are clogged, fans become coated, or dust begins restricting heatsink and radiator fins.
⭐ TidyFormula's Top Picks
Everything Mentioned Above
Before you leave, grab the tools you need to get the job done right the first time:
The safest way to clean a gaming controller is to power it off, unplug or remove the batteries, and wipe the surface with a lightly damp microfiber cloth, using a dry toothbrush or wooden toothpick to loosen grime around the buttons and joystick edges. Avoid soaking it, spraying liquid directly onto it, or using alcohol-based…
The safest way to clean most fabric office chairs is to vacuum the surface first, check the manufacturer’s cleaning code if one exists, then spot-clean with a mild, water-based cleaner or a small amount of upholstery shampoo applied with a soft cloth. Work in gentle, circular motions and let the fabric air dry fully before…
The best way to clean a computer mouse is to unplug it (or remove the battery on a wireless model), wipe the outer shell with a slightly damp microfiber cloth, and use a dry cotton swab or soft brush around the buttons, scroll wheel, and seams. Avoid soaking it, spraying liquid directly onto it, or…
You know that moment when the sun hits your TV at the exact wrong angle… and suddenly it looks like someone ate fried chicken while hugging the screen? Yeah. Dust, fingerprints, and that weird cloudy film you didn’t notice yesterday. ⚡ The TidyFormula™ Quick Answer. Here is: How to Clean a Flat Screen TV Without…
The best way to clean office chair wheels is to remove them from the base if possible, pick out hair and debris with a flathead screwdriver or seam ripper, then wipe the wheel with a cloth dampened in mild dish soap and water. For caked-on grime, a soft brush loosens buildup without scratching the wheel…
Clean a TV screen without streaks by using a dry, soft microfiber cloth first, then a barely damp microfiber cloth with distilled water if smudges remain. Skip glass cleaner, paper towels, and alcohol-based wipes on modern LCD, LED, OLED, and QLED screens, since their coatings scratch and cloud easily. Always power off and unplug the…