How to Clean Tumi Luggage (The Ballistic Nylon Guide)
To clean Tumi ballistic nylon luggage, empty and vacuum the bag, then spot-clean the exterior with foam made from mild dish soap and warm water. Use a soft brush, wipe away residue with a damp microfiber cloth, and air-dry with every compartment open. Do not submerge, machine-wash, bleach, or heat-dry the bag.
I spent an embarrassing amount of money on this bag, so you’d think I would treat it better than a dirty gym sock, but apparently not.
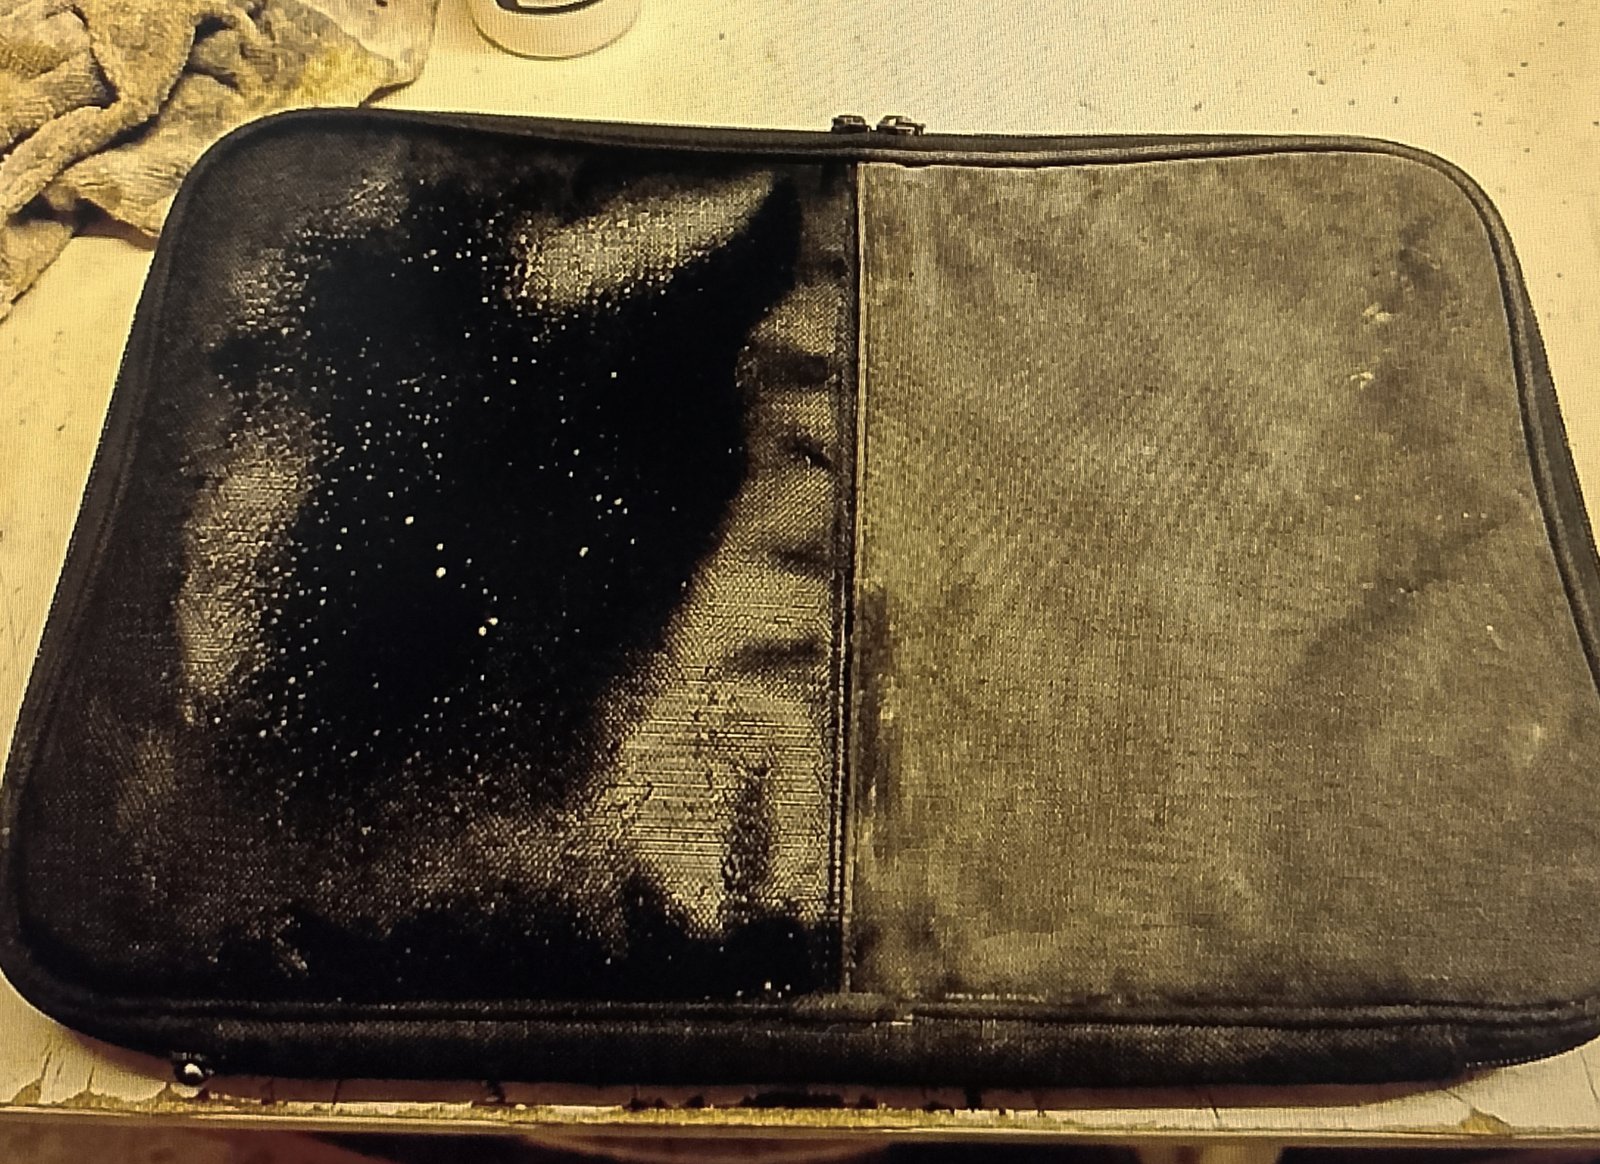
I looked at my Tumi Alpha 3 the other day and realized something disturbing. It wasn’t black anymore. It was a weird, dusty shade of charcoal gray. And the handle? It felt tacky—like it had been held by sweaty palms in a hundred different airports. (Because it had).
If you are currently panic-Googling how to clean tumi luggage without ruining it, the most important rule is simple: Do not soak it.
Ballistic nylon has a dense weave that can hold dust and oily residue. The safest approach is controlled surface cleaning that keeps excess water away from the lining, internal structure, leather trim, and hardware.
What I Use For This Job
Using the right tools saves time and protects your belongings. Here are my exact recommendations:
*As an Amazon Associate, TidyFormula earns from qualifying purchases.
⚡ The TidyFormula™ Quick Answer
The Verdict: Surface-clean ballistic nylon unless the care label for your exact model says otherwise. Use soap foam to loosen dirt without saturating the bag.
- The Mix: About 1 teaspoon of mild dish soap per cup of warm water, whisked into foam.
- Time: About 25 minutes of active work, plus air-drying time.
- Best For: Dust, light grime, food residue, and body oils on washable nylon areas.
Before You Clean: Check the Material and Empty the Bag
Tumi luggage can combine ballistic nylon with leather, coated fabric, molded plastic, rubber, metal, padding, and electronic components. A method that is suitable for nylon may not be suitable for every piece of trim.
Check the sewn-in care label and any instructions supplied with your model first. If those instructions conflict with this guide, follow the model-specific directions.
Before cleaning:
- Remove clothing, documents, luggage tags, detachable accessories, and anything stored in hidden pockets.
- Disconnect or remove any detachable battery or electronic accessory.
- Retract the telescoping handle and inspect the bag for loose stitching, peeling coatings, or damaged trim.
- Blot fresh spills with a clean cloth instead of rubbing them deeper into the weave.
- Test the cleaning solution on a concealed nylon area, such as the bottom edge, and let it dry before continuing.
The Toolkit (Physics in Action)
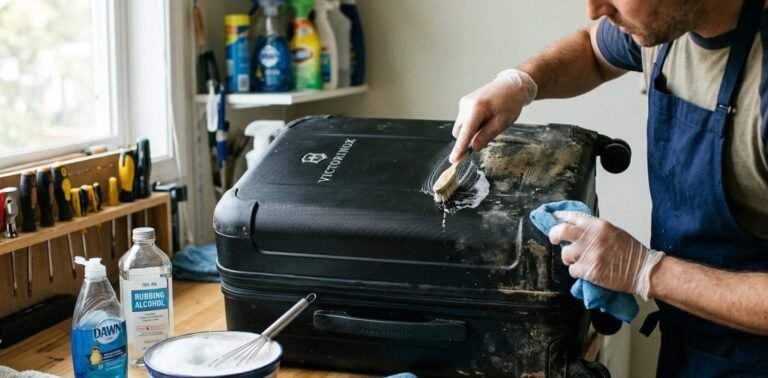
To remove dirt from a tight nylon weave, you need gentle agitation and a small amount of surfactant to loosen oily residue.
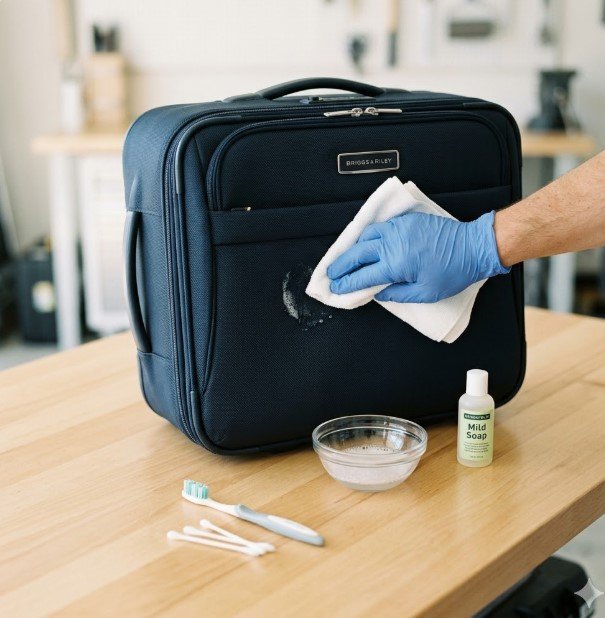
- Soft Bristle Nylon Brush: Or an old, clean toothbrush. The bristles help reach into the weave without rough abrasion.
- Microfiber Cloths: White or colorfast cloths make it easier to see dirt or dye transfer.
- Mild Dish Soap: Use a plain formula without bleach or gritty additives.
- A Bowl of Warm Water: Not hot. Excessive heat can affect coatings, adhesives, and trim.
- Vacuum with Upholstery Attachment: Use low suction where possible.
Step 1: The Dry Extraction
Before getting anything wet, remove loose debris. Adding water to surface dust can create dirty streaks that settle farther into the nylon weave.
- Open every pocket and compartment.
- Turn the empty bag upside down and shake it gently. (I found a boarding pass from 2019 and a fossilized almond doing this).
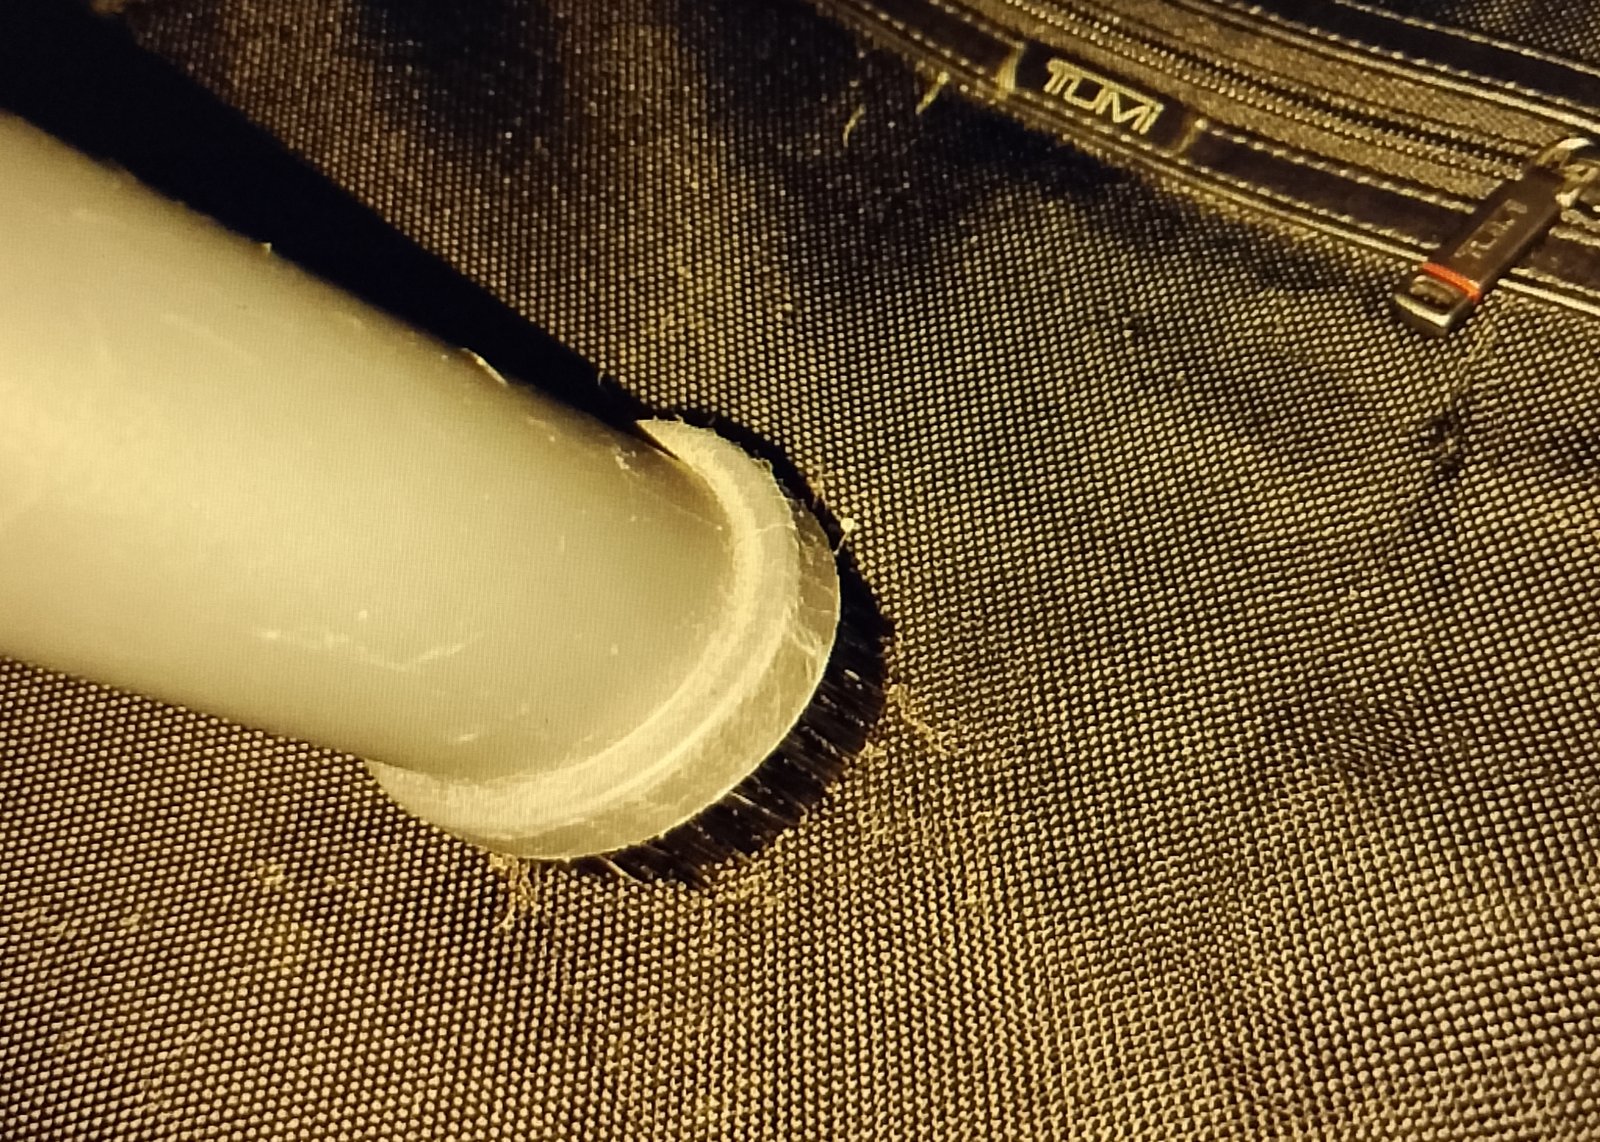
- Vacuum the lining, pocket seams, piping, and exterior fabric using an upholstery or soft-brush attachment.
- Use low suction around loose threads, mesh pockets, zippers, and damaged seams. Do not drag a hard plastic nozzle aggressively across the nylon.

Step 2: Patch-Test the Nylon
Before cleaning a large visible panel, test a small amount of foam in an inconspicuous area.
- Apply foam with a white cloth or soft brush.
- Wipe the area with a separate cloth that is damp, not dripping.
- Let the test spot dry completely.
- Check for color transfer, a light ring, texture changes, coating damage, or adhesive lifting.
Stop if the cloth picks up noticeable dye or the dry test area looks different from the surrounding nylon. Use less moisture or consult Tumi or a professional luggage cleaner before proceeding.
Step 3: The “Foam Only” Method
This is the critical part for learning how to clean tumi nylon luggage correctly. The goal is to clean the exterior fibers without saturating the structure underneath.
🧪 Why Foam Helps
Foam delivers a small, controlled amount of diluted soap to the surface. The soap helps loosen greasy grime, while the brush lifts particles from the weave. Promptly wiping the section removes the dirty solution before it can dry into a residue or soak through the fabric.
- Add about 1 teaspoon of mild dish soap to 1 cup of warm water.
- Whisk or agitate the mixture until a layer of foam forms.
- Pick up only the foam with the brush. Avoid dipping the brush into the liquid at the bottom of the bowl.
- Gently scrub the nylon using short circular or crosshatch motions. Do not bear down hard enough to fuzz the fibers.
- Work one small panel at a time so the soap does not dry on the surface.
- Immediately wipe away the dirty foam with a clean microfiber cloth dampened with plain water and wrung out thoroughly.
- Repeat once if necessary rather than making the fabric wetter during the first pass.

How to Treat Common Stains
Treat stains locally instead of repeatedly cleaning the entire bag. Always work from the outside edge of a spot toward the center to reduce spreading.
Food, Coffee, and Sugary Spills
Blot fresh liquid with a clean, absorbent cloth. Apply a small amount of soap foam, agitate gently, and wipe with a damp cloth. Repeat with fresh cloth sections until no more residue transfers.
Do not pour water directly onto the stain. Sugary residue may require several light passes, but excessive wetting can create a larger ring.
Grease and Conveyor-Belt Marks
Place foam on the spot and let it remain for one or two minutes without allowing it to dry. Gently brush, then wipe. Repeat once if the stain continues to transfer.
Avoid household degreasers, alcohol, acetone, dry-cleaning solvent, and petroleum-based cleaners unless the manufacturer specifically approves them for the exact material. These products can affect dyes, coatings, adhesives, rubberized backing, or nearby trim.
White Soap Marks After Drying
White streaks usually indicate leftover soap. Wipe the area evenly with a clean cloth lightly dampened with plain water, then blot with a dry cloth. Do not add more soap.
Water Rings
If a damp-cleaned spot dries with a visible edge, lightly wipe the entire surrounding nylon panel from seam to seam with a well-wrung cloth. Keeping the moisture light and even can make the transition less noticeable. Stop if dye transfers or the fabric begins to saturate.
Step 4: Clean the Interior Carefully
Most interiors only need dry cleaning unless there is a specific spill.
- Vacuum the empty compartments, pocket corners, and seams.
- Wipe washable lining with a microfiber cloth lightly dampened with the same diluted soap solution.
- Follow with a separate cloth lightly dampened with plain water.
- Blot the lining with a dry towel and leave every compartment open.
Do not saturate padded walls, removable dividers, garment-suiter components, leather details, labels, or electronic compartments. If the lining is loose, delaminating, or stained by ink, stop rather than scrubbing aggressively.
Step 5: The Handle and Hardware
Handles collect skin oil, sunscreen, lotion, and travel grime, but the correct method depends on the handle material.
Plastic or Rubberized Handles
Wipe with a cloth dampened with diluted mild dish soap, then wipe again with a plain damp cloth. Keep liquid out of telescoping-handle openings and joints.
If a rubberized surface remains tacky after the grime is removed, the coating itself may be deteriorating. Repeated scrubbing or stronger solvents can make that damage worse.
Leather Handles and Trim
Do not scrub leather with the nylon brush or use concentrated dish soap. Wipe away loose dust with a soft dry cloth, then use a cleaner specifically labeled for the type and finish of leather, following its directions. Keep leather conditioner off the surrounding nylon because it can leave an oily mark.
Zippers, Logo Plates, and Metal Hardware
Wipe the hardware with a damp cloth, then dry it immediately. Use a soft toothbrush to remove dry debris around zipper teeth without forcing the slider.
If a zipper sticks after it is clean and fully dry, use a small amount of zipper lubricant intended for luggage. Apply it carefully to the teeth and wipe away any excess before it contacts the fabric.
Step 6: Clean the Wheels and Base
The wheels and bottom edge usually carry the heaviest dirt.
- Lay the empty luggage on a towel so you can reach the wheel housings.
- Remove hair and threads carefully with tweezers. Do not cut near wheel bearings or fabric.
- Wipe hard plastic wheel surfaces and the base with a cloth dampened with diluted dish soap.
- Use a soft toothbrush around recessed areas, avoiding the nylon body and axle openings.
- Wipe with a plain damp cloth and dry thoroughly.
Do not spray cleaner or lubricant into the wheel housing. If a wheel grinds, wobbles, or will not rotate after debris is removed, it may require repair rather than more cleaning.
Step 7: The Drying Phase
Open all the zippers and pockets. Stand the bag upright or position it so air can reach both the exterior and lining. Leave it in a cool, dry place with good airflow. A room fan can help, but do not point a heater at the bag.
Do not use a clothes dryer, hair dryer, radiator, or other direct heat source. Avoid prolonged direct sunlight, which can fade fabric and affect some plastics and coatings.
Wait until the seams, pockets, and lining are completely dry before closing or storing the bag. If any area still feels cool or damp, give it more time.
When to Stop Cleaning
Stop and allow the bag to dry if you notice:
- Black or colored dye transferring heavily to the cloth.
- Fabric puckering, bubbling, or separating from its backing.
- A water ring growing beyond the area being cleaned.
- Leather darkening unevenly or developing a rough texture.
- Loose stitching, exposed padding, or moisture entering an electronic compartment.
- A fuzzy or abraded nylon surface caused by excessive brushing.
Once the bag is dry, reassess the area. Persistent ink, paint, adhesive, unknown chemical residue, widespread mold, or damage to coatings is a good reason to contact Tumi or a professional luggage-cleaning or repair service.
Reality Check: What You Can’t Fix
This method removes ordinary dirt, dust, light food residue, and surface oils. It cannot repair frayed nylon, peeling coatings, deep scratches, broken wheels, damaged handles, or permanent color loss.
A dark mark may also be abrasion or dye transfer rather than removable dirt. If repeated gentle cleaning produces no transfer to the cloth, stop. More scrubbing may damage the fibers without improving the mark.
Deep oil stains may require a material-specific cleaner, but stronger solvents can damage water-resistant finishes, adhesives, rubberized backing, and trim.
For me? Getting the dust out and the black color back is enough. It looks 90% new, and that’s good enough for the overhead bin.
Aftercare and Storage
A few simple habits reduce how often the luggage needs a full cleaning:
- Vacuum or brush off dry dust after trips before it settles into the weave.
- Blot spills promptly instead of allowing them to dry.
- Store the bag completely dry, with pockets empty and zippers slightly open for airflow.
- Use a breathable luggage cover or clean cotton bag rather than sealing the luggage in plastic.
- Keep it away from damp basements, hot attics, heaters, and prolonged direct sunlight.
- Do not store heavy objects on top of an empty soft-sided bag.
FAQ: The Skeptic’s Corner
- Can I put my Tumi bag in the washing machine?
- Do not machine-wash structured Tumi luggage unless the care label for that exact item explicitly allows it. Saturation and agitation can distort the bag and damage internal supports, padding, coatings, adhesives, leather trim, or hardware.
- How to clean tumi luggage that smells like mildew?
- First, empty the bag and let it dry completely in a ventilated area. Vacuum the interior and place an open container or breathable pouch of baking soda inside the dry bag for several days without spilling it on the lining. Baking soda may reduce residual odor, but it does not remove active mold or repair moisture damage. If you see widespread mold, recurring spots, or damaged lining, use a professional service. (See How to Remove Mold Smells for more).
- Is vinegar safe for ballistic nylon?
- Do not assume vinegar is safe for the entire bag. Even if diluted vinegar does not affect a nylon test spot, it may contact leather, metal, coatings, adhesives, or other trim. Mild soap and controlled moisture are the better starting point for ordinary dirt.
- How often should I clean it?
- Vacuum or wipe away visible dirt after travel and perform a deeper surface cleaning only when needed. Frequent wet cleaning is unnecessary and can leave residue if too much soap is used.
- Does Tumi offer a cleaning service?
- Service options can vary by location, product, and type of damage. Contact Tumi directly or visit an authorized location to ask whether cleaning, repair, or replacement parts are available for your specific model.
- How do I clean a sticky Tumi handle?
- If the handle is plastic or rubberized, wipe it with diluted mild dish soap and then a plain damp cloth. If it remains tacky after drying, the coating may be breaking down rather than simply dirty. Avoid alcohol and strong solvents. Use a leather-specific method for leather handles.
- Can I use disinfecting wipes on Tumi nylon?
- They are not the best default cleaner because formulas vary and may discolor fabric or affect coatings and trim. Use mild soap for routine cleaning unless the care instructions for the exact bag approve another product.
More Cleaning Guides:
For deeper technical details on the properties of Ballistic Nylon, check out this overview of Ballistic Nylon history and durability.
Everything Mentioned Above
Before you leave, grab the tools you need to get the job done right the first time:
*As an Amazon Associate, TidyFormula earns from qualifying purchases.