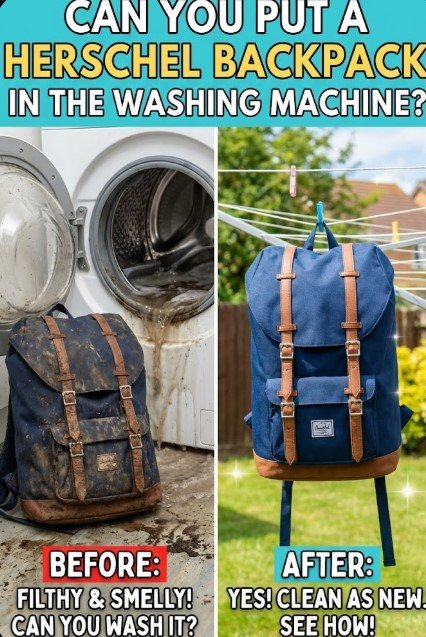
Can You Put a Herschel Backpack in the Washing Machine? (I Wanted to. Herschel Said “No.”)
No. Herschel’s care guidance says not to machine wash or tumble dry its backpacks. Check your bag’s sewn-in care label, then spot-clean it with mild soap and cold or lukewarm water. Avoid soaking the padding, and let every compartment air-dry completely before using or storing the backpack.
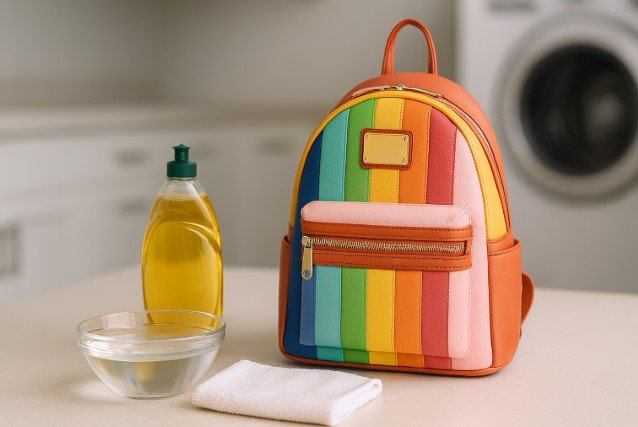
“Spot-clean” does not mean you can clean only one tiny mark. You can clean the entire backpack section by section with a well-wrung cloth. The goal is to control the moisture instead of submerging the bag or saturating its foam and lining.
My Herschel backpack didn’t just look “well-loved.” It smelled like sour rainwater and old snack crumbs. And when I pulled the zipper, it made that dry scrrrk sound like sand was living in the teeth. Not cute.
And I’m the Lead Researcher & Cleaning Realist at TidyFormula.com, but I’m also a frugal minimalist. If I can’t clean it with what’s under my sink, I’m not buying a “special backpack shampoo” in a tiny bottle.
But I’ll be honest: I still stared at the washing machine like it was going to solve my whole life. So I checked the brand guidance first—and yeah, that killed my lazy plan.
What I Use For This Job
Using the right tools saves time and protects your belongings. Here are my exact recommendations:
*As an Amazon Associate, TidyFormula earns from qualifying purchases.
⚡ The TidyFormula™ Quick Answer
The Verdict: Don’t machine wash it. Spot-clean and hand-clean instead, then air-dry.
- The Mix: Mild soap + cold/lukewarm water + soft brush + towels
- Time: 30–50 minutes + air-dry time
- Effectiveness: Best for surface dirt, sweat marks, crumbs, and ordinary odors
Can You Put a Herschel Backpack in the Washing Machine?

Usually, no. Herschel’s own care guidance says do not machine wash or tumble dry. The care label attached to your particular backpack should take priority if it provides additional instructions.
⚠️ Official Manufacturer Warning: You can verify their care instructions here: Herschel: How do I care for my products?
A washer adds prolonged soaking, agitation, and spinning. Those forces can distort foam padding, stress seams and zipper areas, and wear coated or decorated surfaces. Padding can also hold water long after the outer fabric feels dry.
A mesh laundry bag and gentle cycle may reduce abrasion, but they do not eliminate these risks or change the manufacturer’s guidance. Removing internal frames or choosing cold water also does not make a machine cycle equivalent to controlled spot-cleaning.
Check the Backpack Before Adding Water
Different Herschel styles can include different fabrics, linings, trims, prints, and coatings. Before cleaning:
- Read the sewn-in care label. Follow any model-specific restrictions.
- Check for leather or suede trim. Keep these areas as dry as possible and do not scrub them with the general soap solution.
- Look for peeling or sticky coatings. Do not soak or aggressively rub a deteriorating surface.
- Inspect loose stitching and damaged zippers. Cleaning can worsen existing damage if you pull or scrub around it.
- Patch-test first. Apply the solution to a hidden area, blot it, and let it dry before cleaning a visible panel.
Also remove anything that moisture could damage, including electronics, papers, pens, loose cardboard, and items tucked into small organizer pockets. Check whether the bottom insert or any accessories are intentionally removable, but do not cut stitching or force out built-in padding.
Choose the Least-Wet Method for the Mess
Start with the driest method likely to work. This keeps you from spreading dirt or pushing unnecessary moisture into the lining and padding.
| Problem | Best First Step | What to Avoid |
|---|---|---|
| Dust, crumbs, or sand | Shake out, brush, and vacuum using low suction | Adding water before removing loose debris |
| Dried mud | Let it dry fully, brush off loose soil, then wipe the remaining mark | Scrubbing wet mud across the fabric |
| Fresh drink or food spill | Blot immediately, then make light passes with a damp soapy cloth | Rubbing the spill outward or flooding the lining |
| Sweat marks or oily grime | Use a small amount of mild soap and repeat gentle passes as needed | Using concentrated detergent or aggressive scrubbing |
| Rain-soaked backpack | Empty it, blot with towels, open every compartment, reshape, and increase airflow | Adding more water unless dirt or residue also needs removal |
The Frugal, Washer-Free Method
This method limits agitation and moisture, reducing the risk to padding, stitching, prints, and surface finishes.
Tools (Cheap on Purpose)
- Mild soap (plain mild dish soap can work): You only need a few drops.
- Soft brush / old toothbrush: For durable seams, straps, and zipper edges.
- Clean sponge or microfiber cloth: So you’re wiping, not scraping.
- Vacuum (optional but satisfying): Use low suction around loose lining or stitching.
- 2 or more towels: For blotting, supporting the bag, and reshaping while drying.
- A bowl, bathtub, or large sink: Use it to hold the cleaning water, not for a long soak.
Step-by-Step Cleaning Instructions
1. Empty, Vacuum, and Prepare the Bag
Empty it completely. Check every pocket, including small organizer slots. Shake it upside down so grit and old crumbs can fall out.
Open every zipper, remove detachable accessories, and take out any removable rigid insert if the backpack was designed to let you do so. Do not force out padding or parts sewn into the bag.
Vacuum the inside before you add water. This prevents dust from turning into muddy residue. Use low suction and keep the nozzle away from loose threads, peeling lining, and delicate mesh.
Brush dry grit out of the zipper teeth with a clean, dry toothbrush. Do not force a gritty or stuck zipper.
If the backpack has dried mud on it, allow the mud to dry before brushing away as much as possible. Cleaning wet mud can spread it into a larger mark.
2. Mix and Patch-Test the Cleaning Solution
Add a few drops of mild soap to a bowl of cold or lukewarm water. Mix gently. You need lightly soapy water, not a bowl full of suds.
Do not pour concentrated soap directly onto the backpack. Dip a cloth into the solution and wring it well so it is damp rather than dripping.
Patch-test the solution on a hidden area. Let that spot dry before continuing, because some color or finish changes are easier to see when the material is no longer wet.
Spot-clean straps and the back panel. Use gentle circles where sweat and skin oils collect. Avoid hard scrubbing, especially on printed, coated, or visibly worn areas.
Work with clean sections of the cloth. If the water becomes noticeably dirty, replace it rather than wiping loosened grime back onto the backpack.
🧪 Why a Small Amount of Soap Works
Mild soap helps water lift oily residue such as skin oils, food smudges, and grime from the fabric. Using too much does not necessarily clean better; it creates more residue to remove from seams and padding.
3. Wipe the Exterior Panel by Panel
Wipe-clean the exterior one panel at a time. Start at the top so dirty drips do not run over areas you already cleaned.
Rinse and wring out the cloth often. For stubborn marks on durable fabric, hold the damp cloth against the spot briefly, then use a soft brush with light pressure. Do not scrub across peeling coatings, embroidered details, leather, suede, or screen-printed graphics.
Clean zipper tape and the edges beside the teeth with the toothbrush, but keep soap out of the zipper mechanism as much as possible.
4. Clean the Lining Without Soaking It
Vacuum the lining first. If it can be gently turned outward without straining the seams, support it while wiping it with a well-wrung cloth.
For a spill, blot from the outside of the mark toward the center so it does not spread. Repeat with a clean section of cloth instead of flooding the area.
If ordinary wiping is not enough, make several light cleaning passes rather than submerging the backpack. Full soaking is harder to rinse and can leave the foam wet for a long time.
Pay particular attention to bottom corners, organizer pockets, and seams around bottle holders. Small spills and crumbs often remain in these areas even after the main compartment looks clean.
5. Remove Soap, Blot, and Air-Dry
Wipe each cleaned area with a second cloth dampened with plain water. Rinse and wring out that cloth repeatedly until you no longer see suds or feel a slippery film.
Press the backpack between clean towels to remove surface moisture. Do not twist or wring it.
Air-dry only, with pockets wide open. Reshape the bag and stuff it lightly with a clean, dry towel. Replace the towel if it becomes damp. Set the backpack on a dry towel or ventilated rack in the shade, and use a fan for additional airflow if needed.
Do not hang a heavily wet backpack by one shoulder strap. Supporting the bag on a rack or towel places less strain on the strap attachment points while the material is wet.
Do not use the backpack or zip it closed for storage until the straps, seams, lining, and padded back panel are completely dry. The outside may feel dry before the inner padding is ready.
How to Check Whether It Is Fully Dry
Press a clean, dry towel firmly against thick seams, the padded back panel, the bottoms of the straps, and the base of the backpack. Continue drying if the towel picks up moisture or if any enclosed area still smells damp or sour.
Turn the backpack periodically so air reaches the back, bottom, and strap surfaces. Do not rely only on the exterior fabric; thick padding and folded seams usually need more drying time than a thin outer panel.
How to Handle Common Backpack Stains
Dried Mud
Let mud dry completely, then brush or vacuum away the loose material. Use a damp cloth on the remaining mark. Avoid soaking the area at the beginning, because water can spread loose soil across the panel.
Food and Drink Spills
Blot fresh liquid instead of rubbing it. Clean from the edge of the spill toward the center, using repeated light passes with the mild soap solution. Follow with a plain damp cloth so soap and loosened residue do not remain in the lining.
Oily Marks
Use a small amount of the mild soap solution and give it time to contact the mark briefly before blotting. Repeat instead of increasing the detergent concentration. Rinse the area carefully with a plain damp cloth.
Ink, Paint, Adhesive, or Unknown Stains
Do not automatically reach for alcohol, acetone, adhesive remover, or a strong stain treatment. Solvents can affect color, prints, coatings, and adhesives. If gentle soap does not work, stop and seek material-specific guidance rather than experimenting across a large visible area.
Methods and Products to Avoid
- Washing machine: Even a gentle cycle adds soaking, agitation, and spinning that Herschel advises against.
- Clothes dryer, hair dryer, radiator, or other direct heat: Heat can affect coatings, trim, foam, and the backpack’s shape.
- Bleach: It can discolor the material and damage fibers or finishes.
- Fabric softener or laundry sanitizer: These can leave residue and are unnecessary for routine cleaning.
- Hot water: Use cold or lukewarm water to limit the risk of color and finish changes.
- Solvents and harsh stain removers: They may affect adhesives, prints, coatings, and color.
- Stiff brushes, pressure washing, or forceful scrubbing: These can roughen fabric and damage seams or decorations.
- Long soaking: It saturates the padding and makes thorough drying more difficult.
Material-Specific Cleaning Adjustments
Polyester or Canvas-Like Fabric
Use the standard damp-cloth method. Apply the solution lightly and work panel by panel rather than saturating the material. Treat heavily soiled areas with repeated gentle passes.
Do not assume that a canvas-like appearance means the backpack is plain, preshrunk cotton. The fabric may include synthetic fibers, backing, coatings, or internal layers that respond differently from an unstructured canvas tote.
Coated or Water-Resistant Surfaces
Use less water and pressure. Avoid abrasive sponges and repeated scrubbing, which can wear the surface finish. Stop if the coating feels sticky, starts flaking, or transfers to the cloth.
Cleaning can remove surface grime, but it cannot restore a coating that is already peeling or breaking down. Avoid attempting to scrub away tackiness because that may remove more of the finish.
Leather or Suede Details
Keep the general soap solution off leather and suede as much as possible. Blot nearby fabric carefully instead of wetting the trim. Use a material-specific cleaner only when the care label or manufacturer guidance allows it.
Printed, Embroidered, or Decorated Panels
Blot instead of brushing across the design. Always patch-test because pigments and surface-applied graphics may respond differently from the surrounding fabric.
Foam-Padded Straps and Back Panels
Use the smallest practical amount of water and press with a towel after cleaning. Do not repeatedly squeeze or twist the foam. These thick areas can retain moisture after nearby fabric appears dry, so position them where air can reach both sides.
Zipper Troubleshooting After Cleaning
Wait until the zipper tape and surrounding fabric are dry before deciding that a zipper has developed a new problem. Damp fabric can temporarily create extra resistance.
If a zipper still feels gritty, brush the teeth and surrounding tape with a clean, dry toothbrush. Move the slider slowly without yanking it. Stop if teeth are bent, the slider is separating, or fabric is caught in the mechanism; force can turn a minor problem into damaged zipper tape or stitching.
Reality Check: When Cleaning Won’t Fully Fix It
Sometimes you’re not dealing with surface dirt—you’re dealing with moisture or odor trapped in the padding.
- If the inside coating feels sticky or starts flaking, stop wet cleaning and avoid soaking.
- If the smell returns whenever the bag becomes humid, it may still contain moisture or residue. Wipe it again with a plain damp cloth and give it more open-air drying time.
- If one area smells worse after cleaning, check nearby seams and pockets for a missed spill or food residue.
- If there is visible mold deep in seams or padding, extensive coating failure, or a persistent odor that remains after complete drying, consider asking the manufacturer or a professional cleaner whether the backpack can be safely restored.
The Lazy Alternative (Still Decent)
If you want “good enough” without deep cleaning:
- Vacuum crumbs and dust.
- Wipe straps and the back panel with mild soapy water.
- Put a spoonful of baking soda into a sock, tie it securely, and leave it inside the dry backpack overnight. Do not pour loose powder into the lining.
- Remove the sock and air out the backpack the next day with every pocket open near a fan.
This may reduce a mild stale odor, but it will not remove a spill or grime trapped in the fabric. Clean the source of the smell when you can identify it.
Aftercare and Odor Prevention
- Empty food, damp clothing, and drink containers as soon as you get home.
- Leave the main compartment open after carrying sweaty gear or walking in rain.
- Blot spills promptly instead of letting them dry in the lining.
- Brush dirt from zipper teeth before it becomes packed into the slider.
- Store the backpack clean, empty, and completely dry in a ventilated space.
- Spot-clean straps when they become grimy rather than waiting until the entire bag needs cleaning.
Before reassembling the backpack, confirm that any removable insert, accessory, and the pocket where it belongs are fully dry. Reattach accessories without forcing damp or swollen fabric through loops and fasteners.
Wrap-Up
Don’t machine wash or tumble dry a Herschel backpack. Empty and vacuum it, patch-test a mild soap solution, clean one section at a time, remove the soap with a plain damp cloth, and air-dry every compartment completely.
The backpack may not look brand-new afterward, but this method addresses ordinary dirt and odors without exposing the whole bag to a washer’s soaking and agitation.
More Cleaning Guides:
Frequently Asked Questions
What if I machine wash my Herschel backpack on gentle anyway?
Herschel says not to machine wash it. A gentle cycle still soaks, agitates, and spins the backpack, so it can affect coatings, padding, seams, decorations, and shape. A pillowcase or mesh laundry bag may reduce surface abrasion, but it does not prevent saturation or eliminate the forces of the wash and spin cycles.
Can I put a Herschel backpack in the dryer on low?
No. Herschel also advises against tumble drying. Reshape the backpack and air-dry it with all pockets open, away from direct heat.
Why does the backpack still smell after cleaning?
The usual causes are incomplete drying, remaining soap residue, or a missed spill. Wipe the area with a clean damp cloth, open every compartment, and continue drying with good airflow. Check seams and small pockets for hidden residue.
How do I clean a dusty Herschel backpack lining?
Vacuum it first using low suction. Then wipe it with a well-wrung cloth and remove any soap with a second cloth dampened with plain water. Avoid saturating the lining or padding beneath it.
What about leather straps, suede trim, or leather patches?
Keep them as dry as possible and do not clean them with the general fabric solution. Blot the surrounding material carefully and follow the care label or manufacturer guidance for that specific trim.
Everything Mentioned Above
Before you leave, grab the tools you need to get the job done right the first time:
*As an Amazon Associate, TidyFormula earns from qualifying purchases.